Archive for the ‘Small telescopes’ Category

h1

Resources for Naked-Eye and Small-Scope Observing

September 12, 2020

Allan Dystrup’s Classic Rich Field, and more

A few years ago, Cloudy Nights user Allan Dystrup started a thread called “Classic Rich Field“. It’s mostly about OB associations, and the early observations were all done with a Vixen 55mm f/8 scope. Later observations were done with classic refractors of up to 4” aperture, and included night vision enhancement. The thread fired my interest in OB associations, and I admire Allan’s commitment to making detailed observations with small telescopes. Also, other experienced observers chimed in with additional information. It’s one of the best threads I’ve ever encountered on CN.

Allan also published an overview of his Classic Rich Field project in Nightfall, the Journal of the Deep-Sky Section of the Astronomical Society of Southern Africa. It just came out this summer, and it’s a free download at this link (17 Mb).

What I did not know until recently is that he has a bunch of other threads going, including “Classic Messier“, “Classic Best NGC“, “Classic Planet Observation“, and “Classic Moon“. Turns out he also has a clearinghouse page with links to all of them, which is here. Go read and be inspired.

Scott Harrington’s DSOs for Small Telescopes, Binoculars, and Naked Eyes

From the wonderfully useful site Adventures in Deep Space, check out these thoroughly awesome observing lists:

100+ Planetary Nebulae Visible with Small Telescopes & Binoculars, by Scott Harrington

250+ Deep-Sky Objects Visible with 7×35 Binoculars and the Naked Eye, by Scott Harrington

Bob King’s Night Sky with the Naked Eye

I spend a good chunk of every dark sky observing session just looking around, with no instruments. So I was excited when this book came out, I got a copy, and I love it. Of course, that was all four years ago, and you’re just hearing about it now because I’m kind of a lousy blogger. But there you go. Here’s the Amazon link.

h1

The small telescope quest revolutions: my Tasco/Vixen 9VR

April 11, 2017

Now this is deeply satisfying. I have been wanting one of these little beauties for a while. This is the 9VR, a 60mm f/5 achromatic refractor sold by Tasco in the 1980s, but manufactured by Vixen in Japan. These Vixen scopes came out under several brands, including Celestron. It’s basically a “Short Tube 60”, and the spiritual and possibly the actual ancestor of the Short Tube 80s that started taking the world by storm not long after. In fact, there was also a Vixen-made 10VR that basically was the original Short Tube 80, so that evolutionary line may have been real, and direct.

If you can’t already make it out, click through to see the embossed VIXEN on the objective lens cell.

It is a truly tiny scope. At 9.5 inches, a little longer than the PICO-6, and maybe a smidge heavier. I should get them together for a side-by-side comparo.

So how does it work? Optically and mechanically it is very sweet. This is my first experience with Japanese-made gear, and it does not disappoint. I haven’t done extensive optical testing, but the scope shows plenty of detail on Jupiter despite having only 60mm of aperture and 300mm of focal length to work with. It’s fast at f/5, but chromatic aberration is somewhere between “unobjectionable” and “is it even there?” It is, but you really have to look for it; the image is surprisingly clean.

The bottom of the scope, showing the tripod mounting block and the loooong focuser drawtube, with a helical-cut rack. The focuser is so smooth it’s uncanny. I’ve never had a problem with the rack-and-pinion focusers on the mostly low-end scopes I own, but I did not know what I was missing because I did not know that a focuser could be this smooth.

The scope came in a little suitcase-style case with a big block of styrofoam with cutouts for the OTA and a horde of accessories. I haven’t gotten around to taking a glamour shot of my own scope in its case, so this one’s lifted from the web. One of those accessories is a slow-motion alt-az adapter, visible in the middle on the right side. I’ve owned and used similar units by Orion and Celestron and they were fine, but again, this Vixen adapter is so smooth it makes the others look downright crude by comparison.

If you want one of these, it’s like most vintage gear: you can (1) just pay more now, (2) be patient, or (3) be lucky. You can almost always find someone unloading one for $150 or so, but if you wait and keep an eye on Craigslist and Shop Goodwill you can sometimes find one for half that. I have wanted one of these for a while but never enough to get dedicated about the search. Then in around the end of February (yes, I’m getting this posted late) I saw a classified ad on CN for an ‘astro garage sale’ with something like two dozen items on sale. There were no photos of the ’60mm Vixen spotting scope’ but I had a hunch so I wrote to the seller to inquire. He sent some pictures, I sent some money, and here we are.

There is one important point to beware of if you go seeking one of these – Tasco muddied the waters a bit with the serial numbers of this scope and its successors. The original, made-in-Japan, 60mm-working-aperture scope is the 9VR, shown here. When these Vixen-made scopes were gone, Tasco followed them with two more, superficially similar scopes, the 99VR and the 999VR. Both of those scopes were made in China, not Japan, and crucially they have an aperture mask right behind the objective that stops them down to a working aperture of only 30mm or so. The photo below shows the difference clearly, with the stopped-down 99VR on the left and the full-aperture 9VR on the right – the smaller rings inside the 9VR are baffles, farther down the tube and properly spaced to not cut into the light cone (photo used by kind permission of CN user Steve_M_M):

Stopping down the objectives cuts down their chromatic, spherical, and other aberrations, which are apparently much more pronounced than in their Vixen predecessors. I’ve read of people taking apart the scopes to remove these aperture masks, but at least some folks have found the results yucky enough that they put the masks back in. The 99VR and 999VR have a reputation for being fairly sharp as daytime spotters, where light-gathering is less important, but I have to imagine that they suffer quite a bit at night with only 1/4 the light grasp of the 9VR.

The 99VR and 999VR are odd beasts to me. On one hand, they shipped with very desirable accessories, including a nifty tabletop tripod with the 999VR. But the pricing on them seems to me to be all wrong – a lot of people online are offering them for almost as much as you’d expect to pay for a 9VR. That’s a lot of dough for what is basically a glorified 30mm finder wrapped up in a lot more metal and glass than is actually needed. Maybe I’m off here and people are simply charging what the market will bear. I suspect that at least a few buyers haven’t done their homework, though, and get a 99VR or 999VR when what they really wanted was a 9VR. I guess it just rubs me the wrong way that Tasco knowingly sold a whole telescope that was stopped down to half of the apparent aperture.

Another comparo, again with the 99VR on the left and the 9VR on the right, also courtesy of CN user Steve_M_M.

I don’t know how the timing of all of this relates to the demise of Tasco as a desirable brand, whether the 99VR and 999VR were heralds of the approaching decline or symptoms of advanced rot already in progress. That probably sounds harsh – please take it with a big grain of salt if you own and love a 99VR or 999VR. I’m not slagging off the instruments so much as the designers/marketers that thought 30mm scopes masquerading as popular 60mm scopes were a good idea. And with all of that said, if I ever run across an affordable 999VR I will pounce on it just for the tripod. You can learn more about how the 99VR and 999VR compare to the original 9VR in this CN thread and this one.

One other thing to be aware of – the 9VR and both of its successors use 0.965″ eyepieces. If you want to use the standard 1.25″ EPs, you’ve got a couple of options. You can get a hybrid diagonal – 0.965″ in, 1.25″ out – or you can get a 1.25″ adapter that screws into the drawtube. I got one made by Vixen and sold by B&H Photo Video (link). In the above photo, my 9VR is set up for birding with the Celestron 8-24mm zoom, and that is a potent and flexible combination. I have not one but two ‘traditional’ 60mm spotting scopes, and they may both be looking for new homes soon.

I’m glad this came my way. It’s a cool little scope, amazingly well-built considering that it’s a ‘humble’ 60mm and from the stubby end of the gene pool to boot. I wish that these things were still being made – there seems to be a niche there that is not currently filled by anything under about $400.

(About the post title – how else do you follow “Small telescope quest reloaded“?)

h1

Why and how to make a sub-aperture mask for a refractor

February 11, 2017

60mm-aperture-mask-6-comet-edition-close-up

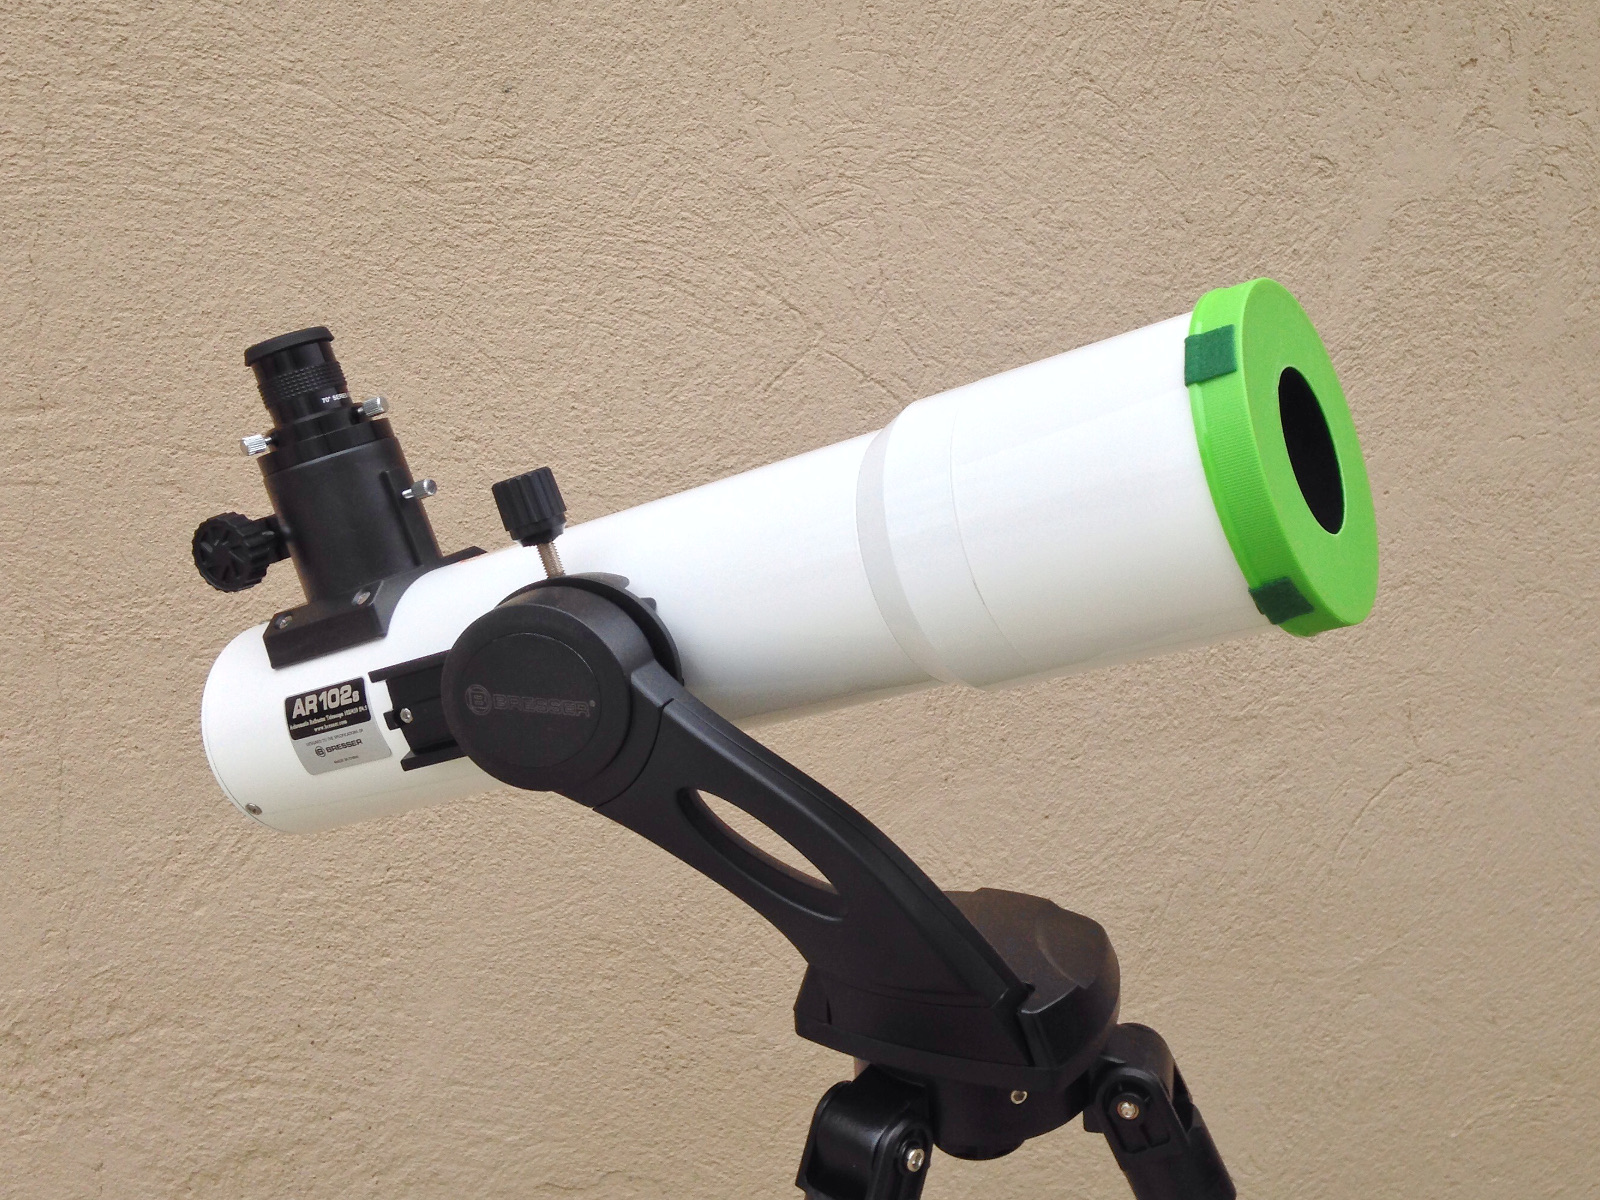
Here’s the Bresser Messier AR102S Comet Edition with a homemade aperture mask. I just converted the scope from a 102mm f/4.5 to a 60mm f/7.7.

“WAT!? You took a refractor, the most aperture-challenged of the three basic telescope designs, and made it even smaller?”

Yup. For several reasons.

The first and most obvious is to control chromatic aberration (CA), also known as false color. Despite the name ‘achromat’, which literally means ‘no color’, doublet refractors without extra-low dispersion (ED) glass do show some false color, because their lenses do not bring all of the colors of light to the same focus point (they’re still a LOT better than scopes with a singlet objective lens, like those used by Galileo). For dim objects like galaxies, nebulae, and most field stars, the effect is not noticeable, even in large and optically fast scopes like the AR102S Comet Edition (nickname needed). But bright objects like the moon, planets, and first magnitude stars will be surrounded by purplish halos, and may have yellowish margins. In effect, the purple and yellow-orange parts of the spectrum are forming out-of-focus images that are superimposed on the main in-focus image.

The problem is that CA gets bad fast as refractors get bigger. There are a couple of standards that are commonly used to describe the focal ratio necessary to minimize CA to acceptable levels, the Conrady standard and the Sidgwick standard. By the Conrady standard, the focal ratio must be 5 times the aperture in inches; by the less stringent Sidgwick standard, 3 times the aperture in inches is good enough. Note that the standards describe focal ratios, not focal lengths, so they go up fast with increasing aperture. Here are some apertures, focal ratios, and focal lengths required to meet the Sidgwick standard:

  • 50mm (2″) : f/6 : 300mm
  • 76mm (3″) : f/9 : 684mm
  • 102mm (4″) : f/12 : 1224mm
  • 127mm (5″) : f/15 : 1905mm
  • 152mm (6″) : f/18 : 2736mm

This, along with mounting considerations, explains why reflectors and catadioptric scopes are progressively more common past 4″ in aperture. A 6″, f/8 Newtonian will be free of false color (as are all reflectors) and has such a gently converging light cone that it is easy to collimate and to focus – it’s easy for such scopes to achieve ‘planet-killer’ status if the mirror is good. A 6″, f/8 achromat will be a beast to mount and it will show lurid false color on bright objects.

But people still make, buy, and use such scopes! Why? Horses for courses: big, fast achromats can be superb deep-sky scopes, where chromatic aberration is typically not a problem. With the fixed sizes of standard eyepieces, achieving wide true fields requires short focal lengths (not just short focal ratios), and bright images require aperture, which drives the development of large but optically fast scopes like the AR102S Comet Edition. At f/4.5, it is well into ghastly CA territory on bright targets. The other night I stayed up late to catch Jupiter, and in the AR102S the planet wouldn’t even come to a clean focus. It was just a bright ball of light inside a sea of purple. I switched over to London’s 60mm f/11 Meade refractor and Jupiter snapped into a sharp and essentially color-free focus. There was a moon emerging from behind the limb of planet, already one moon-diameter out into black space, that was completely invisible in the CA-smudged view of the AR102S.

I’m okay with that – as I noted in a previous post, observing bright solar system targets with the AR102S is deliberate misuse of the scope. When I want good planetary views, I have a 5″ Mak and a 10″ Dob that can both be pushed to 500x (assuming the atmosphere is steady enough). But their max fields of view are pathetic compared to the AR102S – about 1.1 degrees for the Mak, and a shade over 2 degrees for the Dob, versus 3.6 degrees for the refractor, which is enough to take in all of Orion’s sword at once, with space left over on either side.

Still, I’m not going to take all of my scopes out with me every time I go observing, and chances are good that at some point I’ll want to look at something bright even if my main goal for the evening was low-power sweeping with the AR102S. Under those circumstances, it’s easier to have an aperture mask shoved in my eyepiece case than to pack a second scope. Hence this project and this post.

But I’m getting ahead of myself. There are other reasons to stop down a scope besides reducing CA:

  • To reduce glare from bright objects. Mostly applies to the moon when it’s full or very gibbous.
  • To give a more aesthetically pleasing image when the seeing is bad. Opinions differ on this point. Some folks prefer to look through a larger aperture despite the increased susceptibility to bad seeing, on the grounds that in the moments when the atmosphere does settle down a bit, you’ll see more detail. I suppose it depends on whether one is in exploration mode or aesthetic observation mode.
  • To make it easier to focus. F/4.5 is a steep light cone, and it’s easy to overshoot the point of best focus. Stopping down the scope makes a shallower light cone, so it’s easier to watch the image transition from out of focus, to near focus, to in focus. I’m going to test this method of finding best focus on some close double stars.

I had done some calculations in advance to figure out what sizes of aperture masks I’d want to try out. Given that the AR102S has a fixed focal length of 459mm, here are the focal ratios at full aperture and at 10mm decrements:

  • 102mm gives 459/102 = f/4.5
  • 90mm gives 459/90 = f/5.1
  • 80mm gives 459/80 = f/5.7
  • 70mm gives 459/70 = f/6.5
  • 60mm gives 459/60 = f/7.7
  • 50mm gives 459/50 = f/9.2
  • 40mm gives 459/40 = f/11.5

3-inch-sub-aperture-mask

I didn’t want to trade away too much resolving power, so I tested the scope on the moon using cardboard masks of 76mm and 60mm, made from the light cardboard spacers from a box of wet cat food. The 76mm is shown above. Perhaps unsurprisingly, at this aperture and focal ratio (f/6) the view was still unappealingly soft. But 60mm looked good, with minimal CA. This makes sense – the working focal ratio of f/7.7 is a healthy step beyond the f/7.2 that the Sidgwick standard suggests for a 60mm aperture. Going any smaller would be trading away valuable resolution, without significantly improving the image.

60mm-aperture-mask-1-gallon-jar

The light cardboard aperture masks were fast and easy to make, but they weren’t very sturdy. To make a more permanent mask, I needed plastic, heavier cardboard, or foam-core board. So I unscrewed the dewshield from the scope and walked down to the dollar store, where I looked for food packages and storage containers that might fit. Finally on the last aisle I found this 1-gallon plastic jar. The lid slip-fit over the dewshield with just a bit of extra room, which I knew I could shim out with some sticky-back felt.

60mm-aperture-mask-2-marking

I wanted to make sure the lid would fit before I did the hard work of cutting, so I put the felt on first. This was very familiar – it seems like every other scope I get has a loose dust cover that has to be shimmed to fit correctly. I’ve been slowly chipping away at the same package of sticky-back felt since 2010. I didn’t have a compass handy, so I used a small paper ruler to make a ring of marks around concentric 60mm circle inside the lid. Then found a lid to a jar of vitamins that was exactly 60mm in diameter and used that to trace the circle neatly.

60mm-aperture-mask-3-completed-mask

I was going to cut out the aperture using hobby knife, but the plastic was too tough. So I moved up to a box knife, and then a linoleum knife. Then I said heck with it and got the Dremel. The hole I cut wasn’t perfectly circular and had rough edges to boot, so I wrapped some sandpaper around a pill bottle to make a tool for rounding out the aperture.

60mm-aperture-mask-4-comet-edition-before

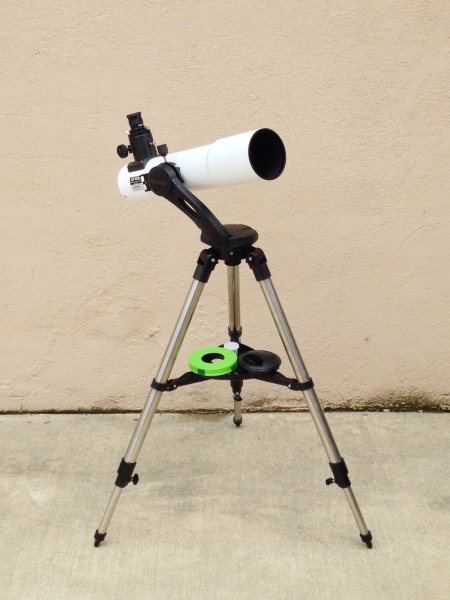
Here’s the scope before…

60mm-aperture-mask-5-comet-edition-after

…and after.

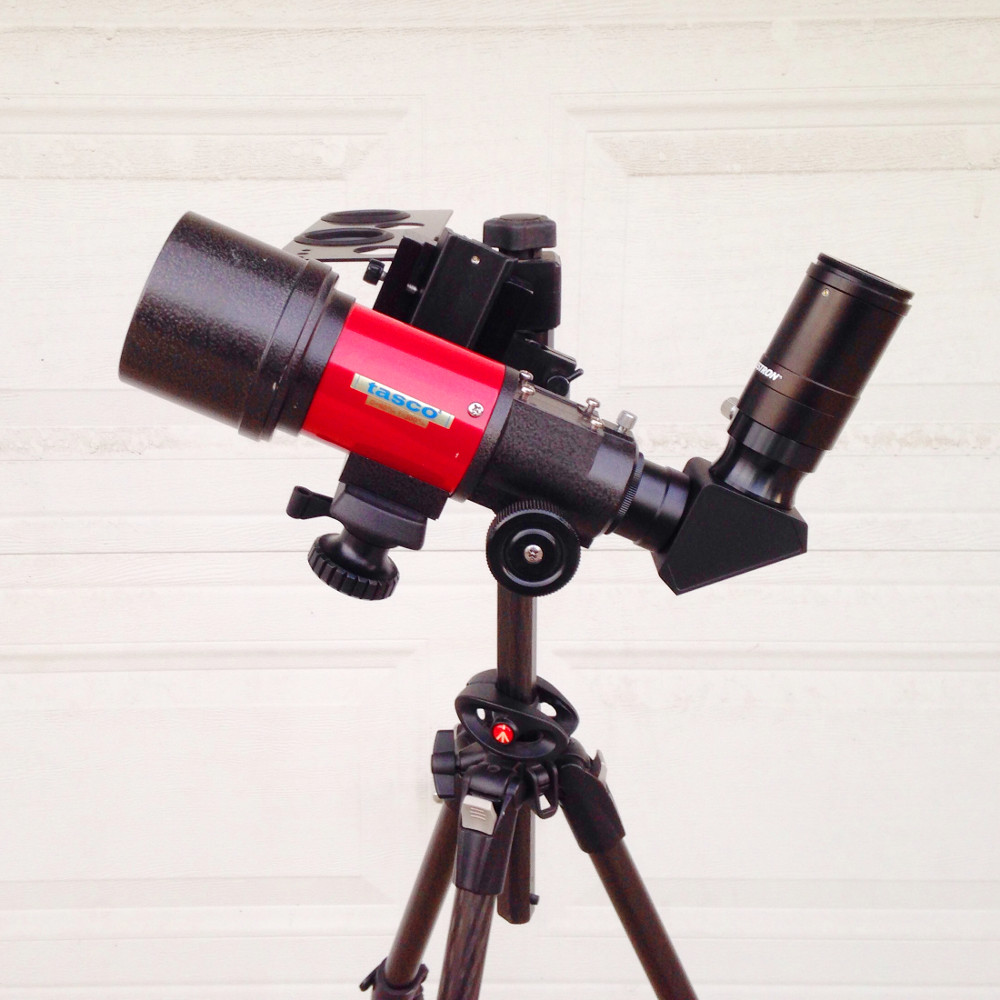
Even with the aperture mask, the AR102S is not a champion scope on solar system targets. The C80ED blows it away, which makes sense – it has a 33% resolution advantage over the stopped-down AR102S, and frankly just better glass. But at least the view now is clean and not appallingly degraded. A dramatic way to see the difference is to get a good tight focus on the moon with the mask on, then quickly take it off without removing one’s eye from the eyepiece, and watch the view get a lot brighter and a lot softer at the same time.

I have a few more things I want to do. The 60mm aperture mask fits over the end of the scope so securely that it could work as a dust cover, if only I can find or make something to plug the central hole. Also, I think I am going to play with making aperture masks in other sizes, just to see what happens.

And finally, I have another 4″ scope that will be fun to make an aperture mask for. But that will be a subject for another post.
skyscanner-aperture-mask-test-fit-jar-lid

h1

SkyScanning in Utah – and Claremont

July 25, 2016
SkyScanner in classroom

Everyone should have one of these.

I’ve been interested in Orion’s SkyScanner 100 tabletop Dob ever since 2012, when I got to look through the SkyScanners owned by Terry Nakazono and Doug Rennie. In particular, the evening I spent stargazing with Doug up in Oregon that October is in my short list of all-time favorite observing sessions. See that observing report here, and be sure to check out Terry’s guest post on the SkyScanner 100 here.

After spending literally years contemplating the purchase, what finally tipped me into SkyScanner ownership was my own forgetfulness. On July 3 I was driving to Utah to spend 10 days hunting dinosaurs with friends and colleagues. I knew I’d want some dark-sky time so I packed my C80ED, eyepiece case, sky atlas, and binoculars. About the time I hit Barstow – just too far to turn around and go back – I realized that I’d forgotten to pack a mount and tripod. So my choices were to roll with binos only, or come up with Plan B on the fly.

The number of dedicated telescope stores on the direct route between Barstow and Moab continues to hover near zero. However, I was already planning to pass through Flagstaff, which has the Lowell Observatory, which has a gift shop. I called ahead: did they have any telescopes in stock? Why, yes, the Orion XT8 and SkyScanner 100, and both were 10% off as part of a holiday weekend promo. Not long after, I had a SkyScanner in the back seat of the car and a song in my heart.

Matt with SkyScanner 100 at July 2016 PVAA meeting

Demonstrating how the SkyScanner can ride on any tripod with a 1/4 or 3/8 bolt.

I spent that first night in Bluff, Utah, after having driven through Monument Valley, which I’d never visited before. Bluff is truly remote – the nearest towns with more than 5000 people are Moab (5046), 100 miles north, and Kayenta, Arizona (5189), 68 miles southwest. So the skies are inky dark. I rolled in pretty late and I really needed to get some rack, but there was zero chance that I was going to pass up first light for the SkyScanner under those jet-black southern Utah skies. I drove about five miles outside of town and pulled over on a dirt road.

The sky was just incredible, even better than out on Santa Cruz Island back in June. Again, the Milky Way looked like an astrophoto and the Messiers in Scorpio, Scutum, and Sagittarius were almost all naked-eye visible (minus a few of the minor globs). I did look at a handful of things with the SkyScanner, and they all looked fine, but honestly I spent more time with my 10×42 binos and even more time than that just staring around with my naked eyes. In skies like that, a telescope can almost be a distraction.

Still, I’m glad I got that first light session in on the evening of the 3rd, because opportunities would be thin for a while. I did set up the scope on the 4th of July, on the trunk of the car in the driveway of my friends’ place in Moab, and we looked at a few things, but everyone was pretty pooped after a day of hunting dinosaurs and partying so we didn’t push very late. And after that, the sky was at least partly cloudy for most of a week.

Finally on the evening of July 10th we got nice, clear skies. I drove out southeast of Moab on the La Sal Loop Road with a couple of new friends and we spent a very pleasant couple of hours rocking through the best and brightest. The SkyScanner performed like a champ.

Howard Karl and Matt at July 2016 PVAA meeting

Karl Rijkse (center) shows his heirloom German binoculars to Howard Maculsay (left) and me.

I’ve only had it out a couple of times since betting back to Claremont, both times for quick peeks. As a grab-n-go scope it is, as far as I’m concerned, unparalleled. With an assembled weight of just over 6 lbs, it is the definition of a one-hander. The tabletop tripod works great, very smooth, and the rubber feet provide a good grip even on the precarious edge of a sloping car hood. And it goes on my Manfrotto tripod (3.5 lbs) for a 10-pound setup that’s perfect for a long session seated or standing.

As you can see from the photos (kindly provided by Terry Nakazono), I took the SkyScanner to last Friday night’s meeting of the Pomona Valley Amateur Astronomers, where it drew a lot of interest. I was going to set up the scope outside after the meeting so we could all have a look at Saturn, but the night sky was almost completely blocked out by smoke from the wildfires and the air quality was terrible, so we packed it in. I think I’ll get in the habit of taking the scope to meetings so we can do a little observing after – it’s always seemed to me that an astronomy club should have at least one working scope at each meeting.

Here’s my number one thought regarding the SkyScanner 100: how extremely stupid of me not to have gotten one sooner. If you’re interested in this scope and you’re on the fence, just do it. Heck, if you’re shopping for a big scope and you’re not sure what you want, get a SkyScanner to keep you busy in the meantime. It’s an insane amount of scope – and mount – for a little over a hundred bucks.

h1

My 9.5-pound observatory

June 27, 2016

IMG_0310

In the last post I introduced my new small scope, the PICO-6 60mm Mak-Cass. After having a positive first light, I decided the scope was good enough to be the center of a new travel observing kit. Here’s the scope mounted on a Universal Astronomics DwarfStar alt-az head and a Manfrotto CXPRO4 Carbon Fiber Tripod.

IMG_0307

Here’s the kit broken down. The case is an AmazonBasics Medium DSLR Gadget Bag, which Doug Rennie helpfully put me on to. The Pocket Sky Atlas and small Night Sky planisphere go in the back pocket. In front of the bag from left to right:

IMG_0305

Here’s everything packed away. This was just a first pass. The final arrangement I came to is as follows:

  • The left-hand slot holds the DwarfStar head with the handle removed and stowed separately, as shown here, and the 6mm eyepiece in its cardboard box, wrapped in a small piece of bubble wrap.
  • The middle slot holds only the PICO-6 OTA, just as shown here.
  • The right-hand slot holds the 32mm Plossl and the 8-24mm zoom eyepiece on the bottom, both of them in the beige metal cases that the zoom eyepieces come in (I had a spare). The tops of the two cases form a horizontal shelf which holds the diagonal, wrapped up in a small drawstring bag.
  • Finally, a piece of bubble wrap goes across the tops of all three slots and gets tucked in at the edges and corners.

Oh, the vertical dividers in the case are held in with velcro so they can be adjusted or removed as needed.

IMG_0303

For flight, the tripod can go in a backpack or in checked luggage, and the AmazonBasics case goes as my carry-on “additional item”. The tripod weighs 3.5 lbs, the fully-packed case weighs 6. For a total of 9.5 lbs, I have a full-size tripod, a smooth, variable-resistance alt-az head, eyepieces giving magnifications of 22x, 29-88x, and 117x, a scope which will show the Cassini Division and split Epsilon Lyrae, a planisphere, and a mag 7.6 all-sky atlas.

Oklahoma dig

This past week I was out at Black Mesa, at the northwestern corner of the Oklahoma panhandle, to dig up dinosaurs. I took the whole kit, and I used it. On Sunday night I showed half a dozen people the moons of Jupiter, the ice caps of Mars, the rings of Saturn, a couple of double stars, and the full moon. Monday night I was too pooped for stargazing. Tuesday I spend a couple of hours observing with my parents and a couple of other visitors who were also staying at the Black Mesa Bed & Breakfast. We looked at the same run of stuff as I had Sunday evening, plus a couple more double stars, the open clusterM7, and the False Comet Cluster in southern Scorpio, which is a visual amalgam of the open clusters NGC 6231 and Trumpler 24. After that, we were clouded out for the rest of the week, but it was still more than worth it to have the little scope along.

Verdict: an amazingly flexible and capable setup. I look forward to many more adventures with it.

IMG_0802

Here’s one more shot from the road. Nothing telescopic – on Thursday morning the rising sun was accompanied by a pair of sun dogs. This is a raw shot with my iPhone 5c. The best sun dogs I’ve ever seen in my life.

h1

Small telescope quest reloaded: the PICO-6 60mm Maksutov

June 26, 2016

IMG_0263

This came a couple of weeks ago. I got it from Kasai Trading in Japan – here’s the link. They market both a 60mm Maksutov-Cassegrain, which is the PICO-6 shown here, and an 80mm Mak-Cass called the PICO-8. These appear to be the same scopes as those sold in Europe as the Omegon MightyMaks, which are available through Astroshop.edu (here) and Amazon.co.uk (here).

IMG_0239

It’s been a while since I posted about small scopes, and after getting the little SV50 refractor nearly six years ago, I declared my small telescope quest complete. But the SV50 turns out to be a more satisfying finder than stand-alone scope, even for air travel. For deep-sky work when I’m traveling, I’m usually happy with binoculars (most recently on the Channel Islands), but sometimes it’s nice to check on the planets, too, and the SV50 just doesn’t have the reach.

IMG_0247

I thought this little Mak might be just the ticket. As you can see, it is tiny. It weighs just a bit over 1 pound. Here it is with a regular-sized beverage bottle and my largest eyepiece, the 2-inch 32mm Astro-Tech Titan.

IMG_0250

And here it is next to the SV50. The SV50 has a focal length of 210mm and a focal ratio of f/4.2. The PICO-6 has a focal length of 700mm and a focal ratio of f/11.7, which makes it roughly equivalent to the 60mm refractors sold by any number of astro vendors. I actually tested the PICO-6 side-by-side with London’s 60mm f/11.7 Meade refractor. The refractor threw up a brighter image – no shock there, since it’s unobstructed and has no mirrors to reduce light-throughput. But much to my surprise, the PICO-6 was a hair sharper: it could resolve fine details and split close doubles beyond the reach of the refractor. The differences weren’t dramatic, but they were there.

IMG_0257

The PICO-6 comes with a dovetail bar and a brass compression ring in the visual back. Both required a bit of work. You can also see two of the three collimation screws in this photo.

IMG_0258

I could not get a diagonal to seat in the visual back. After some investigation, I found that the brass compression ring could not fit neatly down into its groove. It had been poorly made, and had an extra flange of metal in two places that made it wider than the groove. It was the work of 5 minutes to grind down the extra width with my Dremel, but it’s still pretty disappointing. I don’t know how these things are made, but it seems unlikely to me that anyone could have seen this and not known that it was a problem.

Also, on the Kasai Trading “Dear Customers” page (here), under the heading “Quality Inspection” it says (courtesy of Google Translate):

Astronomical telescope of our handling is through the “Jisshi inspection” all by Kasai will be shipped to the customer. This is a test carried out by actually seen the night of stars, most practical-world, but the one that is adopted for performance is a test, it takes time and effort, also takes place on the night of good clear weather of seeing because it can not be accurate inspection unless, depending on the weather will give sometimes can not keep our promise of delivery date. Excuse me, please understand that effect.

That makes it sound like all of the scopes are star-tested before they go out to customers, but that clearly is not the case, because the scope I received was unusable until I fixed the visual back.

UPDATE: I was mistaken. According to Mr. Kasai in an email to a Cloudy Nights user, all of the scopes are tested before they ship out, but when they test them they unscrew the visual back. Here’s the key quote, and the “somebody” he’s referring to is me:

Also I dare to emphasize the fact that we do perform visual test on each unit with artificial stars – to check the residual aberration, collimation and mirror shift. Somebody who bought PICO-6 suspected us of this fact, as the brass ring in the eyepiece adapter was bent and it couldn’t accept an eyepiece easily. I feel sorry we forgot to check this defect on this case, but still this has nothing to do with our visual test.

Full message here.

So, I guess they do test them all. I still think it’s dumb to test all the scopes optically but not mechanically – sending out a scope that is unusable until one of the parts has been further machined is arguably worse quality control than sending out a scope has some spherical aberration. But at least they are optically tested, and I retract my claim that they aren’t.

IMG_0264

The dovetail bar is also a bit wonky. It’s a couple of millimeters narrower than the Vixen/Orion/Celestron standard, so it will fit into a standard dovetail slot, but you really have to trust the thumbscrew because it will be the only thing holding the scope into the mount. I solved this by putting the scope on a dovetail shoe for the pistol-grip ball head shown here – by design or coincidence, that shoe is a good fit for standard Vixen dovetails. With the help of that shoe, I was able to use the scope with my Universal Astronomics DwarfStar alt-az head. More on that soon.

Now, it may sound like I am down on this scope. I’m not. I wish the quality control was a little higher, but the problems were not unfixable. At least for me, with almost nine years of experience tinkering with telescopes – I can’t recommend this scope for anyone who isn’t prepared to do some work on it. And optically it’s okay. It arrived out of collimation, but with a little help from Polaris I was able to get it tuned up enough to catch Saturn’s Cassini Division and split Epsilon Lyrae cleanly into all four components at 117x. After the mechanical difficulties with the scope, that was a welcome surprise.

Then I flew with it, but that’s a story for the next post.

h1

A truly tiny scope – the Synta MC90

November 18, 2015

MC 90 set up for birding

I realized in conversations with Doug and Terry recently that I have not blogged about the Synta MC90. I got one of these way back in the spring of 2009, on my quest for the perfect travelscope. I only used it for about a month before putting it on semi-permanent loan to my brother Todd. I did briefly mention the scope and show the photo of it set up on the hood of the car in this post.

In the early 2000s it was offered by a variety of vendors – I’ve seen units online labeled Synta, Orion, and Omcon. There’s a review of the scope on Cloudy Nights here, and the same article appears verbatim here.

MC 90 business end

It’s an odd little thing: a 90mm Maksutov Cassegrain, but operating at a fast f/5.6 (500mm focal length) instead of the more typical f/13.9 (1250mm). The most obvious con is that with such a steep light cone, the secondary mirror has to be quite large, which degrades contrast. Pros are that it can get a much larger true field of view than the ~1.3 degrees that the f/13.9 scopes are limited to – I’ll have to check, but unless it’s somehow vignetted it should be able to do over 3 degrees – and that it is incredibly compact.

MC 90 length

It is the same ‘barrel size’ as the longer 90mm Maks, but only about 2/3 as long. Take off the diagonal, eyepiece, and strap-on finder (in this case, a red-dot gizmo from StellarVue) and the scope almost disappears, which has two nice effects. First, just about any mount will be sufficient. In the photo at top I have it mounted on a Manfrotto MKCOMPACTACN-BK tripod and the whole setup weighs only 5.5 lbs (2.5 kg).

C90 orange tube in cooler

Second, if you need a case for this scope, you probably can’t do better than to get a six-pack cooler from Wal-Mart, which will set you back about six bucks. In this photo the scope in the “case” is my old orange-tube Celestron C90, but the MC90 fits inside just as easily. The black drawstring bag holds the finder.

Given how much I’ve written about them in the past, you may fairly wonder where my love for little Maks has gone. Each one got killed by a different problem.

SW 90 on tripod 1

My 90mm SkyWatcher Mak got out-competed by other scopes. The Apex 127 is no more trouble to set up but performs significantly better on just about everything, and if I’m in the mood to roll with a smaller scope, the C80ED has better contrast (as demonstrated in this post), takes magnification about as well, and is more versatile. I still have the little SkyWatcher Mak, mostly because I haven’t gotten around to selling it, but I haven’t used it in well over a year and I don’t imagine that I will miss it.

Happiness is--

From left to right: XT12, XT10, AstroScan, C90, XT6, SV50, 5″ SkyWatcher Newt on homemade dob base. Out of all of these scopes, the only ones I still have are the XT10 and SV50.

I sold the orange-tube C90 a long time ago. I really, really wanted to love that scope. I like the idea of that scope. It’s built like a tank, and since it focuses by rotating the barrel like a giant camera lens, there’s almost nothing that can go wrong with it. If that focus action ever does get sticky, there are instructions online somewhere showing you how to disassemble and regrease it. Basically, as long as our civilization can produce grease, and the scope doesn’t get dropped or left out in the rain, it should never, ever wear out.

BUT that rugged, rotating-tube focuser is also the problem. With such a long focal length, you start at medium powers and go up to high power pretty rapidly. That’s just the natural métier of a long focal length Mak. My problem was that it was almost impossible to focus the scope at high powers without nudging it off-target, and in fact the shakes that were induced by having my hand on the OTA were usually enough to make precise focus a guessing game anyway. It wasn’t a mount problem, it was me needing to paw at the scope to get it to do anything. Don’t know how many other people had the same problem, but I note that for its current, popular, and inexpensive incarnation (still around $160), Celestron has gone to the same rear-mounted focus knob as everyone else.

Synta MC90

Image borrowed from Cloudy Nights.

Finally there’s this MC90. I never really gave it a fair shake back in the day. I only had it about a month before loaning it to my brother, and I’ve only used it on one or two evenings since, neither of them in the last five years. Also, my observing interests have changed. Back in 2009 I did a lot more lunar and planetary observing, and now I’m more interested in DSOs and low-power, widefield scanning, where the MC90 might do better. I’m going to borrow it back this Christmas and give it a serious workout. I’ll let you know how that goes.

h1

Double stars and the Double Cluster: a short observing run in bright skies

October 17, 2015

I completed a major lecture Thursday so I treated myself a short stargazing run in the driveway that evening. Transparency was rotten – it was so humid here that even with the temps in the low 70s I was still sweating, and with all that water vapor to bounce back the city lights, the sky was bright to about 45 degrees above the horizon. I did a quick turn around the sky with my old 7×35 binoculars, which I’d not used in ages, and all I could see were the major constellation outline stars. I decided to see what the C80ED could do, in part because it’s my best grab-n-go scope and I knew it would be a short run, and in part since I’d just had it out under much darker skies.

I started on M57, the Ring Nebula, which is obvious even at low power under most conditions. This time out, the Ring was just a ghostly blob in averted vision at any magnification, even when Lyra was still quite high. But the seeing was rock-steady. Epsilon Lyrae, the famous double-double star in Lyra, was very elongated, like a pair of 8s, at 68x, and cleanly split – juuuuust barely – at 100x, although I had to go up 136x to easily hold the split in direct vision. After that I bopped over to Cassiopeia/Perseus to split some doubles (Eta Cass was nice) and look at the Double Cluster. Didn’t attempt a sketch, I was just rolling for aesthetic appreciation, but I did use a lot of magnification and spent more time on the clusters than I usually do. I had not noticed before that NGC 884 has an empty center. I mean, under dark skies there are plenty of stars in the middle, but the bright stars form a series of arcs around the edge, and under so-so skies those outer bounding arcs of stars are all you can see. NGC 869 is the opposite, it just gets more and more concentrated toward the center, albeit unevenly.

Double Cluster from SEDS

The Double Cluster: NGC 884 (left) and 869 (right). Photo borrowed from SEDS.

At 11:20 the clouds suddenly thickened up – in the space of five minutes I went from pleasant observing to totally socked in. After I got everything stowed, I went inside and looked up Stephen O’Meara’s entry on the Double Cluster in his Caldwell Objects book. His observations were gratifyingly similar to mine, but I learned some interesting stuff about the clusters. They are BIG and they are distant: 7300 light years, compared to less than 4000 light years for most Messier open clusters, and dimmed by about 1.5 magnitudes by intervening dust clouds. One shudders to think about how much more impressive they’d be if they were only half as far off and not obscured by interstellar dust.

Anyway, a good run. We’re clouded out this weekend, so I’m glad I got it in.

h1

Observing report: Deep and dark in Big Bear

October 12, 2015

Big Bear Lake

This past weekend I was up in Big Bear for a few days’ vacation. The proximate reason was the PVAA tour of the Big Bear Solar Observatory on Friday, Oct. 9 – more on that in another post. London and I went up Thursday evening with Steve Sittig, who runs the Hefner Observatory at the Webb Schools here in Claremont. Thursday evening Steve took us out to one of his favorite dark-sky observing sites a few miles east of Big Bear. (I didn’t get any pictures from the observing site, so you’re getting pictures of London and me hiking instead.)

We had hoped to get an early start but a succession of minor things kept us from getting set up and going until about 10:15 PM. By that time astronomical twilight was long over. There was a noticeable light dome from the LA metro area but it only badly affected the last 15-20 degrees above the local horizon, and only in the southwest.

Oh, speaking of the ‘local horizon’ – the site is in a shallow bowl with low hills fairly close on three sides and a bit more distant on the fourth. We could occasionally see lights from vehicles on a bend in the road about a mile off, but other than that, no artificial lights were visible from the site. None. The altitude is around 6700 feet.

The combined effect of this was that the sky was dark right down to the horizon. There was none of the usual near-horizon crud that obscures objects for the first 10 or so degrees after they rise. The seeing was worse near the horizon but the transparency was still excellent. We looked at Orion virtually as soon as it was up, and although we really had to pour on the magnification to split the Trapezium, the nebulosity was already very extensive.

A word about gear. Steve had his ETX 125, a 5-inch f/15 Mak on a motorized base with a hand controller. London had his Orion 20×50 compact spotting scope – I have been regularly kicking myself for not snapping up one of those for myself while they were still available. I had my C80ED refractor on the SkyWatcher AZ4 mount (= Orion VersaGo II), as well as my trusty old Celestron UpClose 10×50 binos. The choice of the C80ED was driven by two things: my space on the drive up was limited, so it was either the C80ED or the Apex 127 (which would have basically duplicated Steve’s rig), and I knew I’d want to do some wide field, low power observing, which is the one thing the Apex 127 can’t do.

For eyepieces, I spent most of the night using the 24mm ES68, which in the C80ED gives 25x and a sprawling 2.7-degree field. When I needed more power – which is much less often than I had anticipated – I bumped up to the 14mm and 8.8mm ES82s (43x, 1.9-degree field, and 68x, 1.2-degree field), and on a couple of tough double stars, the 6mm Expanse and 2x Shorty barlow. Unusually for me, I didn’t even mount a finder. With a 2.7-degree field, I can usually get the scope on target just by sighting down the tube. On those occasions when I needed more accuracy, I could lay my green laser pointer into a couple of shallow v-shaped notches on the tube ring and just move the scope until the laser was pointing where I wanted to go.

London Big Bear hike

Within moments of hopping out of the car, we could see loads of detail in the Milky Way with our naked eyes. The Double Cluster and the Andromeda Galaxy were both easy as well. Later on, we also spotted the excellent open clusters M35 and NGC 752 without optical aid. I logged the seeing as 4/5 and transparency as 5/5.

Our first few observations were “best in class” objects – the Pleiades, the Double Cluster and Stock 2. At low magnification under dark skies, the Double Cluster looks not so much like a pair of isolated objects, but rather a couple of thickenings or condensations in an incredibly rich Milky Way starfield. So it was that evening. Seeing that far above the horizon was rock steady and even at low mag, the C80 focused the stars down to tiny pinpoints of brilliant light. One of the clusters has a pair of red giants near its center – these were visibly brighter and more yellow than the rest of the cluster stars, even at 25x.

After that I turned west to catch M13 before it got too low. Going up to 68x revealed tantalizing hints of resolution – not bad for an 80mm scope.

M57, the Ring Nebula, was an arresting sight. At 25x, I could get both of the ‘corner’ stars that mark that end of the Lyra parallelogram, with M57 as a small but crisp circle of nebulosity floating in inky dark space. Although we also looked at the nebula with more magnification, I found that lowest-power view delightful. It reminded me of spotting the Ring at 12.5x in the TravelScope 70 three years ago – the view that first infected me with refractoritis.

We didn’t try to split Epsilon Lyrae until a bit later, when it was lower in the sky. The seeing there was only so-so and I had to push the scope to 200x, using the barlowed 6mm Expanse, to get a clean split, although both pairs were visible elongated at much lower magnification.

We stayed out long enough to catch the leading edge of the Big Dipper rising. One of the best views in that part of the sky is the galaxies M81 and M82 in the same field of view. They are close enough to be nicely framed in the same field even in the 8.8mm ES82. At that magnification (68x), M82 was starting to show tantalizing hints of structure.

London and Matt hiking above Big Bear Lake

The most memorable observations of the night were of the Auriga Messier clusters and the other Local Group spiral galaxies. Auriga clusters first – M38, M36, and M37 (from west to east, in the order that they rise) are seasonal favorites and fun to compare. We swept them up easily in binoculars and then scrutinized them in the scopes at progressively higher powers. I had a good laugh at M36 – at the orientation we saw it in this weekend, it looked like a short, fat stick figure, the bobble-head version of the Stock 2 stick-man. But M37 was my favorite, just an incredibly dense swarm of tiny pinpoint stars.

Fairly early in the evening we had a look at the Triangulum galaxy, M33. I was tracing out the constellation Triangulum with the GLP when we noticed a naked-eye glow that turned out to be the fine open cluster NGC 752. Neither of us could make out M33 with our naked eyes but it was dead easy in binoculars, and at 25x in the C80ED it showed considerable structure in averted vision, including what both of us independently took to be one of the spiral arms. Incredible.

We closed the session with another great view of a local galaxy. All through the three-hour session we’d been saying that we’d look at Andromeda, and then one thing or another would capture our attention and we’d get sucked into some other part of the sky. We finally got around to M31 and its companion galaxies a little after 1:00 AM. By that point they were basically at the zenith. Even with the tripod extended as high as it would go, we had to kneel to look in the eyepiece. But when we did, the view was astounding. M31 stretched all the way across the field, with only the very outer edges clipped by the eyepiece’s field stop. The little companion galaxies M32 and M110 were dead easy, of course, but what amazed me was that we could both see structure and detail with the main galaxy. I’d never seen those dust lanes in anything smaller than a 5-inch scope.

We knocked off after three solid hours of observing, exhausted but giddy. It was one of those transcendent nights that makes my heart sing, and also makes it really hard to go back to observing from suburbia. The most surprising thing for me was how much observing I got done with the 24mm ES68. “Small telescope at low power” does not scream satisfying deep sky observing, but under sufficiently dark, clear skies, I rarely needed anything else. I’m already looking forward to the next run.

h1

How to build a stand for a Dobsonian telescope

November 19, 2014

DIY dob stand 1

London got an Orion XT4.5 for his birthday last week. We’ve had it out a couple of times and it is an awesome scope. It strongly reminds me of my old XT6–the XT4.5 is a bit smaller, but probably not as much as you’d think from looking at photos of it. It’s solid, moves well, and the optics are great.

It is, however, too short. Even for London, and he’s just a bit over 4 feet tall. Clearly, we needed to get the scope up off the ground. The first night out, just to test potential setups, I put the scope up on an old plastic milk crate. This is the heaviest, sturdiest milk crate I’ve ever seen, and the scope still rocked back and forth on it. We needed a 3-legged solution.

Now, Orion makes a dedicated Dob stand that is really nice. It has grooves instead of divots to accommodate Dobs of many sizes. It also costs about $145, which I think is stark raving lunacy for 4 pieces of wood that any idiot could screw together.

DIY dob stand 2

The Dob stand I am about to show you will also accommodate any size of Dob, as long as you build it that way. It also costs next to nothing. For me it was precisely nothing since I used old crap I found in the garage: wood from a long-defunct futon (the same futon that gave some of its physical body to my old DIY Dob base), some metal shelf supports from a project that never got off the ground, screws from my “spare screw” box, and the modest tools I already owned, namely a saw and a handheld drill.

Step zero was to have London sit in one of the folding chairs that we use when we go camping or up Mount Baldy to stargaze, then set up the XT4.5 in front of him on the floor, pointing straight up, and measure the vertical distance between the eyepiece and his eye. As always when building anything to do with a Dob, it’s better to skew low–it’s always easier to bend down an extra inch to get to the the eyepiece at the horizon than it is to lift your butt an extra inch when the scope is pointed straight up. My rough target height for the stand was about 6 inches.

Conceptually this thing is dead simple: it’s just a ‘T’ of wood, reinforced on either side with the shelf supports. I figured out the dimensions by putting the XT4.5 down on a big sheet of paper and tracing the feet, and then laying the wood down on the paper sheet and tracing the cuts that I would need to make.

DIY dob stand - top close-up

Once I had the basic T-shape together, I set the XT4.5 on it and traced the feet again, directly onto the wood, then used a spade bit to drill out some depressions. The spade bit has a triangular tooth at the center that cuts a deeper hole, and that became the pilot hole for the screw that holds each leg on. So the legs are precisely below the feet of the Dob for maximum strength and stability.

DIY dob stand - foot close-up

In addition to the big screws that run down their long axes, the legs are reinforced with small angle brackets. These are probably overkill, but I wanted to build this thing once and then not worry about it for the next decade or two. In retrospect, angling the two “back” legs toward the center might have been smarter than making them parallel to the cross-bar. But like I said, this thing is probably over-built as it is.

DIY dob stand 3

The last step was to paint it with a couple of coats of black primer, which I also had lying around in the garage. The black paint definitely classes it up a bit. From a few feet away in the dark, you might even mistake it for something that had shipped with the scope.

How does it work? Wonderfully. I took care when I used the spade bit to cut the depressions so that the feet of the XT4.5 just fit inside their outer edges. Once the XT4.5 is settled in place, it will not slide or rock at all; it practically snaps in. You’d have to knock it over to get the ground board to move. You can grab the tube and swing it all over the sky and the ground board and stand stay put. And there’s no detectable vibration. The legs are each 5 1/4″ long and the T is 7/8″ thick, so the height is acceptably close to my “roughly six inches” goal. More importantly, London is able to observe comfortably while seated, whether he’s looking at Polaris low in the northern sky or the Andromeda galaxy dead overhead (and it was the other night, too, darn near straight up).

DIY dob stand 4

There is one final addition I want to make before I call it done: I want to sink a cap nut into the bottom of each leg. That way I can screw bolts of various lengths into the legs to make smaller feet. The stand as built does not rock on any surface on which I have tried it (driveway concrete, grass, and gravel so far), but the bottoms of the legs are long enough that it potentially could. Using bolts as feet would make the contact patches smaller and reduce the opportunity for rocking. Plus, that way the stand can grow with London: as he gets taller, we can swap out the foot-bolts for progressively taller pieces. I’d use cap nuts instead of T-nuts so the support bolts couldn’t punch through and damage the wood.* With a bigger Dob, I might put on casters. In fact, the swiftness and ease with which this thing came together–I did essentially everything but paint it in one afternoon–has got me thinking about building a rolling unit for the XT10. If that ever happens, you’ll read about it here.

* It just occurred to me as I was finishing this post that if it wouldn’t have upset London to start hacking on his brand-new scope, I could have sunk cap nuts into the ground board of the XT4.5 itself, and put long threaded bolts straight into them to make feet. If I ever get an XT4.5 of my own, I’ll probably do exactly that.**

** It further occurred to me after the post went up that the ground board already has threaded holes for the rubber feet, which have embedded bolts and screw in from the bottom. So in fact if I had thought it through I probably could have skipped the whole Dob stand entirely and just screwed 6-inch-long bolts into the ground board; if the included rubber feet are loafers, those long bolts would be stiletto heels. I haven’t actually tested that setup, mind you, but it seems like it ought to work.

If you don’t have a bunch of crap lying around in your garage, you can probably still build something like this for under $20, maybe less than half that if you can scrounge the wood. If you don’t have metal shelf supports and don’t want to spring for them, you could cut pieces of wood to reinforce each side of the ‘T’ diagonally. Painting is optional, the thing works just as well in its unpainted ugly state. If your woodworking skills are like mine–nearly nonexistent–you can also use the unpainted unit to make your carpenter friends cry. Have fun!