Archive for October, 2013

h1

Algol at last

October 29, 2013
gladiator

ARE YOU NOT ENTERTAINED? IS THIS NOT WHY YOU ARE HERE?

Whew! I just now–well, about an hour ago–made my final observation for the Astronomical League Urban Observing Program. The final target was Algol, the “demon star” in Perseus, and one of the finest naked-eye variable stars in the heavens.

Now, I have seen Algol hundreds of times. It is also known as Beta Persei, because when it’s not in eclipse it is the second-brightest star in the constellation. But I had never tracked its brightness through one of its eclipses until the All-Arizona Star Party this year. The eclipses happen every 2.87 days when the dimmer star of this close binary passes in front of the brighter member. The effect is pretty striking–over the space of about three hours, Algol goes from being a twin of Almach (Gamma Andromedae, mag 2.1), to nearly as dim as Kappa Persei (mag 3.8).

Algol_Chart_l

Chart from Sky & Telescope

Now, the Urban Club rules say nothing about observing Algol more than once, but I figured the only reason it was on the list is because it’s such a noted variable star, and therefore the only respectable thing to do was to observe it both in and out of eclipse. My observations from this year’s AASP didn’t count because they weren’t made from in town. So I have been waiting. On Oct. 8 I was clouded out. By the 11th, it was not yet dark when Algol was in mid-eclipse, and it was probably below the horizon, to boot. Three nights ago I was clouded out again. Three nights hence it will probably be too low and too early to see clearly. So I either had to bag it tonight or wait until late November.

I didn’t think it was going to happen tonight. Mid-eclipse was supposed to be at 10:46 PM. At 10:15 it was still raining. But by 10:45 it had stopped, so I popped outside for a quick peek. The sky was full of clouds but there was a big sucker hole rolling in from the west, aimed right at Perseus (or rather, aimed right at the blank wall of clouds that I knew Perseus was lurking behind). But the sucker hole started closing up as it crossed the zenith and I got just a brief glimpse of Alpha Persei before the clouds knit themselves together completely. Curses!

Still, sucker holes are to stargazing what nibbles are to fishing–or maybe more accurately, what the occasional small winning hands are to poker. So I grabbed the old Tasco 7×35 binoculars that I got back in high school, pulled a folding chair out of the garage, and sat down to wait. I didn’t wait terribly long–at 11:14, the clouds tore open over Persei for just a bit. I couldn’t see the whole constellation, not by a long shot. But there was a bright star farther up the sky–Almach, surely–and a dim one closer to the horizon–Epsilon Persei, I reckoned, and a couple in the middle about equally dim–Algol and Rho Persei, just possibly? I snatched up the binoculars and found my putative Algol in a squashed trapezoid of stars, with an arc of three slightly dimmer ones just off to the north. Then the clouds rolled back in.

Well, I’d seen something, and had a fair idea of the relative brightnesses of the different objects, but had I seen Algol? I dashed inside for my Pocket Sky Atlas and breathed a big sigh of relief. There was Algol in the squashed trapezoid. The arc of three slightly dimmer stars to the north is anchored on Kappa Persei, one of the better comparison stars for estimating Algol’s brightness. At the time I saw it, Algol was midway between Kappa and Epsilon Persei in brightness, which is about right for half an hour past max eclipse.

Incidentally, the squashed trapezoid and arc of three stars that I used to identify Algol and Kappa Persei are not visible in the simple finder chart above, nor are all of the members visible to the naked eye under less than excellently dark and clear skies. I would have been hosed without the binos to confirm where I was in the sky–not the first time that binos have saved my butt, and almost certainly not the last, either.

So, here’s some homework. Don’t print out that Sky & Tel chart above. Instead, just grab your favorite atlas and a pencil and write in the brightnesses of the following stars:

  • Almach (Gamma Andromedae) – 2.1
  • Algol (Beta Persei) – 2.1-3.4
  • Epsilon Persei – 2.9
  • Kappa Persei – 3.8

Now you’ll have the brightnesses of all of the most useful comparison stars in your atlas, and you’ll never be without them (if you don’t have an atlas, use the Evening Sky Map, or download one of the free atlases listed on the sidebar to the right). For finding the eclipse times, use the calculator at Sky&Tel.com. If you track Algol through one of its cycles, report back with your observations. I’m going to sleep…with the Urban Program finally laid to rest.

h1

Mount Baldy moonrise

October 27, 2013

2013-10-19 Mt Baldy moonrise

Last Saturday London and I were stargazing up on Mount Baldy. I knew the waning gibbous moon was going to rise a little before 8:00. What I had not anticipated is how awesome it would look, coming up through the trees on the next ridge over, a mile or so away. And because I had not anticipated that, I didn’t have the camera with me.

So, nothing for it: we had to go back up the mountain Sunday night, with the camera this time, just to catch the moonrise. Up top is the tweaked and left-right corrected version, below is the raw image.

Next month I want to go back and catch the full moon rising. I’ll keep you posted.

IMG_1008

h1

Ken Fulton on refractors

October 24, 2013

If I’m succumbing to refractoritis, I’ve at least had some help getting there. David DeLano and Terry Nakazono have let me look through their big beautiful lens-based scopes. Darrell Spencer posted about the crisp views through his huge refractors on CN. And Doug Rennie sent me this back in August. It’s an excerpt from Ken Fulton’s under-appreciated book, The Light-Hearted Astronomer.

Read it at your peril.

Ken Fulton - Light Hearted Astronomer - excerpt on refractors

h1

Guest post: Photographing the moon with the Celestron 102GT

October 21, 2013

Here’s the first guest post by frequent commenter and sometime observing buddy Doug Rennie. He’s using the same OTA I’ve been using recently–the Celestron 102GT achromatic refractor–but the rest of his setup is different from mine: different mount, diagonal, eyepiece, and camera. Just goes to show that this scope plays well with lots of other gear. I flipped some of the photos to match the orientation of the moon in the sky, but otherwise they are as Doug sent them. The captions and any errors therein are mine. Enjoy!

IMG_3393 - Northeast quadrant

The northeast quadrant of the moon. The landing sites for Apollo 11, 15, and 17 are all in this quadrant.

So I went out several nights last week with the waxing gibbous moon looming large and bright over our front courtyard, and took out the C 102 on a Porta II with my Celestron 8 x 24 zoom attached to my DSLR for some eyepiece projection AP. Took a lot of photos, most of them so-so to utter crap, but maybe 8 or so not half bad. I still need to focus more on . . . focus. Note in the photo that I insert the zoom/camera into a 2″ High Point Scientific 99% dielectric diagonal vs directly into the focuser as this is a lot easier to work with, and having done it both ways, I really see no image quality drop-off using the diag.

Scope and camera setup

The Celestron 8 x 24, as you can see from the photos, allows the removal of the rubber eye cup which exposes a threaded male connection; this allows the eyepiece to be mounted directly to the t-ring on my Canon T1i DSLR. Eyepiece projection photography. I found that to achieve focus using the LED LiveScreen at the back of the camera (which works well; my eyesight is the issue here) that I need to run the shutter speed up into the 3-4 second range so that the image is bright enough to both fill the screen and capture the necessary (for focusing) details. Once I have focused, I then move the shutter speed back to that which I will actually be shooting at, usually (depending on brightness and how much of the darker Mares fill the screen) anywhere from 1/30 to 1/160, the most common being around 1/60, ISO set at 800 for most.

Closeup on diagonal eyepiece and camera

I also use a remote shutter release cable (about 4 bucks through eBay) to cut camera movement/vibration down to next to nothing.

With the zoom, I can go everywhere from 42x to 125x magnification, and everywhere in between, with a quick quarter turn.

The north-central portion of the moon. The smooth dark crater on the lower left is Plato, and the deeply-shadowed crater with the bright rim far to the north is Philolaus.

The north-central portion of the moon. The smooth dark crater on the lower left is Plato, and the deeply-shadowed crater with the bright rim far to the north is Philolaus.

The C 102, as you pointed out in your report, serves up wonderfully bright, sharply-resolved images and much of this comes through in the photos. Any soft edges are more the result of my less-than-perfect focusing than with any of the optics involved.

Also, these are all single shots: focus, click, move on. Stacking? We don’t use no stinking stacking!

The prominent crater in the upper middle is Copernicus, with the Apennine mountains curving away to the northeast, marking the rim of Mare Imbrium, the Sea of Rains. Near the lower left are three craters making a backwards comma--these are Ptolemaeus, Alphonsus, and Arzachel (Arzachel has a prominent central peak).

The prominent crater in the upper middle is Copernicus, with the Apennine mountains curving away to the northeast, marking the rim of Mare Imbrium, the Sea of Rains. Farther down and to the right are three craters making a backwards comma–these are Ptolemaeus, Alphonsus, and Arzachel (Arzachel has a nice central peak).

I am now waiting until Jupiter and Saturn again appear in my observing window, along with M42, M45 and other brighter DSOs as I believe I can capture some decent images with my current set-up, as long as I don’t need to go longer than 12-15 seconds. We’ll see.

This shot is from a few nights previous to the last one. Now the backward comma formed by Ptolemaeus, Alphonsus, and Arzachel is right on the terminator, just slightly above and right of center.

This shot is from a few nights previous to the last one. Now the backward comma formed by Ptolemaeus, Alphonsus, and Arzachel is right on the terminator, just slightly above and right of center.

Frankly, I never see myself getting heavily into AP as the costs alone are prohibitive, plus all the technical stuff overwhelms me just thinking about it. That, and it seems to me that too many of these big time AP guys do little, if any, visual observing, that their views of the heavens mainly come after the fact when they look at the photos they took. Not me. My biggest joy is still what I see at the moment via the EP. But it’s still fun to screw around with modest gear/modest goals AP, especially when its Moony out and that’s about all there is to do. But I am eager to try my new eyepiece projection technique on Saturn and Jupiter when they next appear, and am optimistic that I can even score some good photos of brighter DSOs such as the Orion Nebula and the Pleiades, which won’t be long now.

The bright crater above and left of center is Tycho--note the rays of ejecta that point back to this young, well-defined crater. Below Tycho is the much larger, worn Clavius, with a nice arc of craterlets of decreasing size on its floor.

The bright crater above and left of center is Tycho–note the white rays of ejecta on the right that point back to this young, well-defined crater. Below Tycho is the much larger, worn Clavius, with a nice arc of craterlets of decreasing size on its floor.

h1

Big fish with light tackle

October 20, 2013

From the first time I read it, I have had a strange fascination with Jay Reynolds Freeman’s “Refractor Red meets the Herschel 400” (available here), wherein he describes observing the legendary deep-sky list with a 55mm refractor. Freeman wrote, “Ask people who land big fish with light tackle, why I do what I do.”

Lately I’ve been working through a slew of the open clusters in the Herschel 400 myself. And I have found that some clusters are dead easy to recognize as distinct bright patches in my 9×50 finder, but at the eyepiece they just sort of dissipate into the background starfield. That plus some fairly transformative rich-field experiences with small refractors (like this one) are working some kind of alchemy on me.

In a feat of Freeman-like proportions, my friend and frequent 10MA contributor Terry Nakazono has logged and sketched over 500 DSOs in the past 3 or so years, including 368 galaxies, almost all with scopes under 5″ aperture, mostly from at least somewhat light-polluted skies. He is just religious about dark adaptation, averted vision, and patience.

Possibly as a result of all of the above, lately I have had this mad desire to go out to the desert with a 70mm or even a 50mm refractor and spend the whole night observing with only that instrument. It feels like my reverse aperture fever and my deep-sky interests are slowly colliding. That plus a sort of perverse desire to knowingly commit to a “suboptimal” (aperture-wise) observing program just because it sounds fun.

I shared this plan on CN and fellow user blb wrote:

No mater what size telescope you use, it seems that you are looking at objects that are on the limits of what can be seen with that size scope. Once I realized this and read, some years ago now, what Jay Reynolds Freeman had to say about his observations, I came to realize there were way more objects to be seen in a small telescope than I would probably see in my lifetime.

I think this is exactly right; I find that with whatever instrument I have to hand, I tend to throw myself up against its limits.

AstroMedia plumber's telescope: a 40mm achromat made with plastic plumbing fittings

AstroMedia plumber’s telescope: a 40mm achromat made with plastic plumbing fittings

In particular, I know that all of the Messier objects have been logged with a 50mm telescope. What about a 40mm scope? I see that AstroMedia has a 40mm f/11 achromat kit (also available from AstroMediaShop.co.uk). That is strangely fascinating to me. (It would be simpler to use a larger scope and simply stop it down to 40mm, but somehow it seems more “pure” to use a scope with a native aperture of 40mm.) However, I think I would first do a Messier tour with a Galileoscope; just because other people have found all the Messiers with a 50mm scope doesn’t mean that I will, and it makes sense to start with that easier goal before plunging right into uncharted territory. It would be mighty tempting to put the 40mm scope and the Galileoscope on the same mount, though…

So…I’ll keep you posted.

h1

The Rule of Ones

October 19, 2013
C102 2013-10-18

Tonight: one scope, one target. Here’s the scope.

I have several distinct modes as a stargazer. Sometimes I’m in exploration mode and I want to see and log new objects. Sometimes I’m in gear mode and I want to see how a given piece of equipment performs. Sometimes I’m in aesthetic mode and I just want to look at beautiful things. Sometimes I do all three in one night, or even looking at one object.

The last post, about current and future observing projects, was written in exploration mode. “Exploration” might seem like an odd word to apply to the activity of tracking down lists of things compiled by other observers. But if I haven’t seen them myself, then there is still the thrill of the hunt and the rush of discovery. And looking at all of these things is how I personally transmute caelum incognitum into known space. That’s exploration in my book.

Saturday night at the Salton Sea, I was in a blend of aesthetic mode and gear mode, because my ongoing thought process was basically, “Oh, hey, that beautiful thing is up now. I wonder how it looks through these scopes?” I think the only new thing I logged was 8 Lacertae, and if I hadn’t been so close to fiinishing the Double Star program, I wouldn’t have logged any new objects at all, despite staying up almost all night.

I do like observing lists. Some people dismiss them as stamp collecting or say that they make a fun pursuit into work. Well, different strokes, I guess. For me, observing lists come with the implicit subtitle, “Hey, here are the next n-hundred things that are really out there to be seen, any of which might knock your socks off.” Every observing program I have completed has introduced me to new favorite objects, which I periodically revisit, and has broadened my knowledge and experience of the cosmos.

But with all of that said, I don’t do enough casual stargazing, with no plan or agenda. That’s all I used to do, in my first few months as an amateur astronomer, and it almost killed me. Observing programs gave me a way to simultaneously learn the sky and educate myself about what’s up there. But the pendulum may have swung too far now; I hardly ever haul out a scope just to take a quick peek at the moon or Saturn.

All of this is on my mind because of a thread on CN called “When astronomy becomes a chore….” Here’s are some excerpts that have been much on my mind:

RussL: If I feel lazy I can get by with just the 120ST and my trusty TV Widefield 32mm. That way I don’t even have to feel obligated to see each object at every power I can. Easy.

Me: Peace through deliberately limited options–I love it! You have inspired me, sir.

RussL: Well, thanks. I’m glad to know my laziness has helped someone. But, it’s true that sometimes we need to relax more. It’s kinda like when I was a kid with next to nothing to view with, but happy as a clam with whatever I had. I have much more now, although not all that much. I guess part of the difference nowadays is that I have so much more knowledge and feel like I need to use it more. But there’s also a lot to be said for just having a good time without feeling like I must do everything possible.

karstenkoch: I’ve been mentally kicking around an idea for awhile that is still taking shape in my head. For lack of anything better to call it, I’ll call it the “Rule of Ones”. I’ve seen some comments above like it, so I thought I would mention it. There’s really nothing to it other than in order to keep things simple, easy, pure, and enjoyable do or choose only one of everything. Take one scope outside. Take only one eyepiece too. Pick one target to observe. You can imagine all of the other variables involved … choose or do only only one of each. Then, with no more decisions to make, just have a rest under the stars and enjoy your time observing and reflecting.

I like that. One scope, one eyepiece, just go. That sorta dovetails with another idea that has been growing in my mind–more on that in the next post.

Full moon - Oct 18 2013

And here’s the target.

h1

Double stars, urban observing, and where I go from here

October 17, 2013

There’s one observation from last Saturday night at the Salton Sea that I haven’t mentioned yet. At 2:25 AM, I found and split the double star 8 Lacertae, the 100th and final target on my trip through the Astronomical League’s Double Star observing program.

I don’t typically observe double stars from dark-sky sites. Or rather, I do check in on old favorites like Epsilon Lyrae, Albireo, and Beta Monocerotis for purely aesthetic reasons, but I usually try not to log double stars from dark-sky sites. I figure that double stars are about the only deep-sky objects that show up just as well in town as they do out in the boonies, so if I log double stars from dark sites, I’m not only wasting my dark-sky time, I’m also using up some of the best observing targets that I can see from my driveway. (At this point, someone out there is thinking, “Using up!? You can’t use these things up!” Au contraire–the joy of discovery upon first observing an object is an irreplaceable quality, and if I burn all of that out in the desert, what do I have left for the driveway?)

Anyway, the Double Star list is done, and I’m only one observation away from finishing the Urban Observing Club. So what’s next for me?

First, as a sort of cosmic background radiation of my observing, I will keep plugging away at the Herschel 400, sometimes from home, often from Mount Baldy and the desert. Currently I’m at 171 of 400 objects, so plenty of things left to see. I recently picked up Stephen James O’Meara’s Herschel 400 Observing Guide–stay tuned for a review at some point–and I think it will help me formulate a plan for actually finishing this before the end of time.

Second, I’m kinda hooked on double stars, and I’ve been putting off the AL Binocular Double Star Club until I finished the regular Double Star observing program. This will also give me a chance to put the Nikon Action 10x50s through their paces; for the previous binocular observing programs I used the Celestron Skymaster 15x70s and UpClose 10x50s. So that’s a new driveway observing project to occupy me for a while. (If you’re wondering what I’ll do when I’m past the two AL double star clubs, there’s always the Herschel 500 double stars, and still more beyond that.)

Third, there’s the Suburban Messier Project. I should just dig out a sketchbook and get going on that.

Fourth, and almost at the intersection of the above projects, is this. When I was in Portland last fall, I hit Powell’s Books–as all right-thinking people must–and picked up a copy of Stephen James O’Meara’s The Secret Deep. This is the fourth volume in his Deep Sky Companions series, following his Messier and Caldwell books and Hidden Treasures, which I scored in the spring of 2012. Now, I’ve been through the Messier objects many times, and I’ve seen almost all of the Caldwell objects, but Hidden Treasures and The Secret Deep contain a host of things which I have never observed. And O’Meara is one of my favorite authors when it comes to stargazing books. So I am thinking that I might make those books the centerpieces of my deep-sky observing for the next while, and try to sketch my targets and then compare my observations with O’Meara’s. There are a fair number of Herschel 400s in both books, so working through the books would also advance me a little closer to finishing that project, too.

And beyond that? Well, I have some ideas. I have Sue French’s first book, but I haven’t worked through it yet, nor have I picked up her more recent book. Steve Coe’s underappreciated Astronomical Tourist, Dave Eicher’s Deep-Sky Observing With Small Telescopes, and Phil Harrington’s Cosmic Challenge are all sitting on my bookshelf, mostly read but not “done”. And lurking beyond everything else are the Herschel 2500 and the 7000 double stars, variable stars, and deep-sky objects from Burnham’s Celestial Handbook.

So I’m not going to run out of things to point the scope at. The question, as always, is what to point the scope at next.

For a philosophical one-eighty from this post, see the next one.

h1

Observing tip: make a comparison chart for your eyepieces

October 16, 2013

MJW eyepiece comparison chartSherlock Holmes once exclaimed, “Data, data, data! I cannot make bricks without clay!”

I often feel the same way at the eyepiece. The more I know about what I’m looking through, and what I’m looking at, the more I understand what’s going on and can make meaningful evaluations and comparisons. At a minimum, I like to know what magnification I’m working at, and it is often helpful to know the true field of view (TFOV) and exit pupil (the width of the beam of light entering my eye). So I made a table with all of that information, for every combination of eyepiece and telescope in my inventory, and I keep it on a clipboard with a few other odds and ends.* So if I’m using a 21mm Stratus in my Apex 127, I don’t have to stop observing and do long division to work out the magnification.

* Single-sheet all-sky maps of the Messier and Caldwell objects (from here and here), often a tear-out map of the moon or the Milky Way from S&T, and the logbook for whatever project I’m working on.

As you can see, my table is a pretty bare-bones affair. I didn’t even give it a title,  just left it as “Sheet 1”. And when I got the C102 last week, I just wrote in the additional column by hand. But it’s a crazy useful thing to have along, and if you haven’t made one for yourself, I recommend it.

How do you calculate all this stuff?

Magnification is telescope focal length divided by eyepiece focal length. So in the XT10 (f/l = 1200mm), the 14mm ES82 gives a magnification of 1200/14 = 86x.

True field of view is apparent field of view divided by magnification. It’s important for star-hopping and celestial navigation; if you know that a certain object is two degrees west of a given star, that’s two eyepiece-fields if the EP gives a one-degree field. The ES82s have an 82-degree apparent field, the ES68 and Stratuses have 68-degree fields, the Expanse has a 66-degree field, and the Plossls all have 52-degree fields. In the same example listed above, the 14mm ES82 in the XT10 gives a TFOV of 82/86 = about 1 degree (0.95 to be exact).

Exit pupil equals the diameter of the scope’s objective lens or primary mirror divided by magnification. That’s pretty much what magnification is: taking a wide beam of light with a small image scale and turning it into a narrow beam of light with large image scale. To keep using the same example, in the XT10 (250mm diameter) the 14mm ES82 give an exit pupil of 250/86 = 2.9mm.

A lot of people, myself included, find that eyepieces become a lot less comfortable to use when the exit pupil gets under 1mm. In contrast, large exit pupils are very comfortable because you can move your eye around a bit without losing the light beam. Most veteran deep-sky observers recommend an exit pupil of about 2mm as the optimum for picking out faint details. This is explicitly a trade-off between brightness and image scale: lower magnifications offer a brighter image but smaller image scale; higher magnifications give a larger image scale but spread out the light so the image is dimmer. The only way to beat that trade-off is to move up to a bigger scope, which will let you have a brighter image at a larger image scale. That’s why aperture matters.

h1

Revenge of the Celestron Travel Scope 70

October 15, 2013

IMG_0932

Update: This post seems to get a lot of traffic, especially around the holidays. If you’re looking for good gifts for amateur astronomers, including telescopes and binoculars that won’t break the bank, you may also be interested in myastronomical wish list for beginning stargazers.

– – – – – – – – – –

Last year I picked up a Celestron Travel Scope 70, mostly because it was cheap (~$65) and I was curious. Except for a couple of quick peeks with the scope, the only serious workouts it got were the transit of Venus and an all-nighter on Mount Baldy.

My feelings at the time–explained here–were that the scope was great a low-power scanning but useless at anything over 50x. Terry Nakazono suspected it was miscollimated, but I’d never collimated a refractor and I had plenty of other stuff to be getting on with, so I let the TS70 languish.

This fall, London has been showing more interest in astronomy and I let him have the TS70 as a hopefully more user-friendly alternative to the Astroscan, which is a cool scope but can be a real PITA to get on target with.

The first problem is that although the TS70 has an actual dovetail bar, it is so ludicrously short and so far forward on the tube that it is almost impossible to balance the scope. For reasons that escape me at the moment, I have several spare dovetail bars lying around, so I grabbed the next larger one to put on the TS70.

IMG_0801

But there’s a problem: the bolts that hold the ludicrously short dovetail (LSD henceforth) on the scope are threaded into nuts inside the tube. You can see those nuts and bolts at the bottom of the tube in the middle distance in the above photo. But you can only see them because I had to remove the objective lens to get this picture.

IMG_0803

Well, in for a penny, in for a pound: I disassembled the whole damn scope. Here are the bits. The hex wrench set and screwdriver are mine, the solar film inside the lens cap (described here) is one of my hacks, but the rest is as it came from the factory. Only, you know, taken apart. From 12:00, the bits are:

  • the tube with the finder still attached;
  • three screws for attaching the focuser to the tube;
  • said focuser;
  • the black plastic dust cap from the focuser;
  • the LSD, its two hex bolts, and their nuts;
  • the two pieces of glass that make up the objective lens;
  • the retaining ring for the objective lens;
  • the dust cap (with solar film) for the objective lens, with the dew shield inside.

The dew shield slides off, and the retaining ring for the objective lens simply unscrews. There’s nothing else holding the two components of the objective lens in; once the retaining ring is off you can simply tilt the tube down and let them fall out–onto something soft (so they don’t get scratched), that isn’t your hand (so they don’t get smudged with oils). The focuser is held into the tube with the three screws, and the LSD is held on with the two bolts and their nuts. So there are really only five fasteners holding the scope together, or six if you count the objective lens retaining ring.

IMG_0804

So, about that objective lens. This is an achromatic doublet, meaning that it has two pieces of glass of different compositions (the ‘crown’ and the ‘flint’), to bring more than one color of light to focus at once.  In the above photo, the crown is on the left and the flint is on the right. They are different colors, but I’m not sure if that’s because of different light transmission or different coatings. Note the three little foil spacers on the flint, which keep the two lenses at the proper distance.

IF you ever disassemble a multi-element lens, it is extremely important that you keep the parts not only in the right order, but also facing the right way, or you are going to waste a lot of time trying different arrangements (and risking damage to the glass) until you discover how they go together. Better to just keep track of them as they come out.

IMG_0806

Next item: unless their edges are blackened, lenses suffer from internal  reflections, which cause reduced contrast at the eyepiece. Lots of cheap scopes and eyepieces have un-blackened lens edges, so whenever I take something apart, I blacken the edges. I use a sharpie, two coats, but I’m sure there are other ways.

Aaanyway, the retaining ring for the objective lens is almost always too tight when the scope ships from the factory, and simply unscrewing the ring and gently shaking the tube to settle the lenses is often enough to improve collimation. And that’s all I did here.

So how’d it work out? Last summer, I wrote:

The scope starts to pant around 40x and anything north of 60x is just bad…. Trying to achieve focus on planets is maddening. Jupiter goes from a vertical fan of red light on one side of focus to a horizontal fan of blue light on the other, and only sort of flirts with being a clean disk in between those extremes, at an infinitesimally tiny point that the rack-and-pinion focuser tends to shoot right past.

But Saturday night out at the Salton Sea, the reassembled Travel Scope 70 was like a brand new scope. Images were still pretty crisp at 67x with a 6mm Orion Expanse, and going up to 133x with a Barlow did not just add empty magnification. Here are my observations on different objects.

Polaris

At midnight, I split Polaris with the TS70 using the 6mm Expanse. I note this because In his review of the TeleVue 76 (an $1800 scope), Ed Ting wrote,

There was a time, not terribly long ago, when splitting Polaris was said to be a good test for a three inch scope. In today’s brave new apochromatic world, however, splitting Polaris is something of a joke.  Polaris is easy.  The double-double is easy.

That’s cool, but the TS70 is not an apochromat (a three-lens-element scope with better control of false color and therefore usually sharper optics than an achromat), nor is it a three-inch scope (2.75″ to be exact). So the fact that Polaris was cleanly split at relatively low magnification (67x) has to be a win.

Epsilon Lyrae

What about the double-double, aka Epsilon Lyrae? I Barlowed the 6mm Expanse to get 133x, which is where I run out of eyepieces and Barlows to increase the magnification on this scope. The northern member, ε1, was clearly elongated but not cleanly split, but ε2 was cleanly split. That’s a little nuts, because ε2 has a narrower separation (2.3 arc seconds) than ε1 (2.6 arc seconds), so it should be harder. I can think of several possible explanations, most having to do with the  fact that the ε1 pairs were lined up horizontally in the sky at 12:20 AM, whereas the ε2 pairs were lined up vertically:

  • the scope might have some astigmatism that is more pronounced horizontally than vertically;
  • my eyes might be more sensitive to vertical than to horizontal separations (I have no idea if this is true, but it’s possible. Maybe I should check some time.);
  • the separations were so seeing-dependent (even ε2 was not cleanly split all the time) that any unevenness in the atmospheric turbulence between me and the stars–say, the heat plume from a distant campfire–might have thrown things one way or another;
  • the more pronounced brightness difference between the ε1 components (magnitudes 4.7 and 6.2) compared to the ε2 components (5.1 and 5.5), although not normally a factor, might have made that one a tougher split since I was working at the hairy edge of what the scope and the conditions would support.

Anyway, since the closer pair of the double-double was cleanly split even under the less-than-perfect conditions Saturday night, I feel confident saying that this scope will split the double-double.

Jupiter

From my notebook:

1:50 AM. Jupiter in TS70 with 25mm Plossl (16x), just a bright spot. In 12mm Plossl (33x), a disk with two bands. In 6mm Expanse (67x), hints of more than 2 belts during moments of steady seeing, but bad seeing easily visible in image–Jupiter looks like it is on fire. Barlowed 6mm Expanse (133x): this is too much mag. No new detail, and previously seen belts and zones are harder to make out. No problem focusing using moons, though–I think problems are seeing, not scope.

3:57 AM. TS70 to Jupiter, in 6mm Expanse (67x, definitely more than 2 belts/zones showing now that Jupiter is higher in the sky. Planet is still visibly “burning” in the bad seeing. Three to four belts visible, meaning at least two different belts in addition to the bold equatorial belts, but hard to hold both extra belts at one.

Trapezium in Orion

Again from the notebook:

  • 25mm Plossl (16x) – 2 components (3 visible, but only 2 cleanly split)
  • 17mm Plossl (24x) – 3 components
  • 12mm Plossl (33x) – 4 components cleanly split

TS70 waxing gibbous moon 2013-10-12

Misc

Mars was a visible disk in 6mm Expanse, but swimming in the near-horizon murk near Regulus.

M81 and M82 easily visible in 25mm Plossl (16x), showing some detail in 12mm Plossl (33x).

M31, M32, and M110 visible in one field with 12mm Plossl (33x).

I spent some time on the moon, and snapped the photo above using a Canon S100 point-and-shoot and a 25mm Plossl. I flip-flopped it left-to-right and lightly sharpened it in GIMP, but didn’t mess with the brightness or color. It’s not an amazing image–a 90mm Mak will thoroughly spank this scope (proof)–but it’s not bad.

Conclusion

So, I have to revise my opinion of this scope. As supplied, I still have major reservations:

  • the tripod is wretched, and struggles to hold a small point-and-shoot digital camera stably, let alone a telescope;
  • the finder is a joke: too small to start with, then stopped down, and using plastic lenses to boot. But it makes a decent sight tube if you strip out the guts. London thinks the stripped version is the bee’s knees;
  • supplied backpack is okay, but no pockets inside or out, and only one partial divider inside (not that you’re buying this for the backpack, just sayin’);
  • eyepieces are nothing special and replacing them should be a top priority;
  • as supplied, my scope had two major problems: the LSD, which all TS70s ought to share, and badly miscollimated optics on this sample, which were easy enough to fix by completely disassembling the telescope and voiding the waranty. Also, focus is still a hairy procedure at high powers, and it is easy to overshoot best focus.

However, if you’re willing to buy or build a new mount and put in a little elbow grease, there is a surprisingly capable scope lurking inside this unassuming package–one that is capable of doing useful work on the observing field. Even with mostly plastic, jokey accessories, this scope is still a decent deal, although I shudder to think about the many unfortunate users who try to use the scope on the supplied tripod.

I note that according to the commonly-used “50x per inch of aperture” rule of thumb for max magnification, a 2.75-inch scope ought to be good up to 138x, which is pretty darned close to what I was working at (133x). So to be fair all I have established here is that the scope is adequate, according to one widely-used and fairly conservative guideline. But it’s so much better now than it was last summer–an actual observing tool, not just a toy. And that’s a win.

h1

Observing report: Night of the Refractors

October 14, 2013

IMG_0907

London and I were back at the Salton Sea this past Saturday night (Oct. 12-13). It was our first time there  since my accidental Messier Marathon back in March. In between times it has been too darned hot to go camping in the desert. It was good to be back.

C102 at Mecca

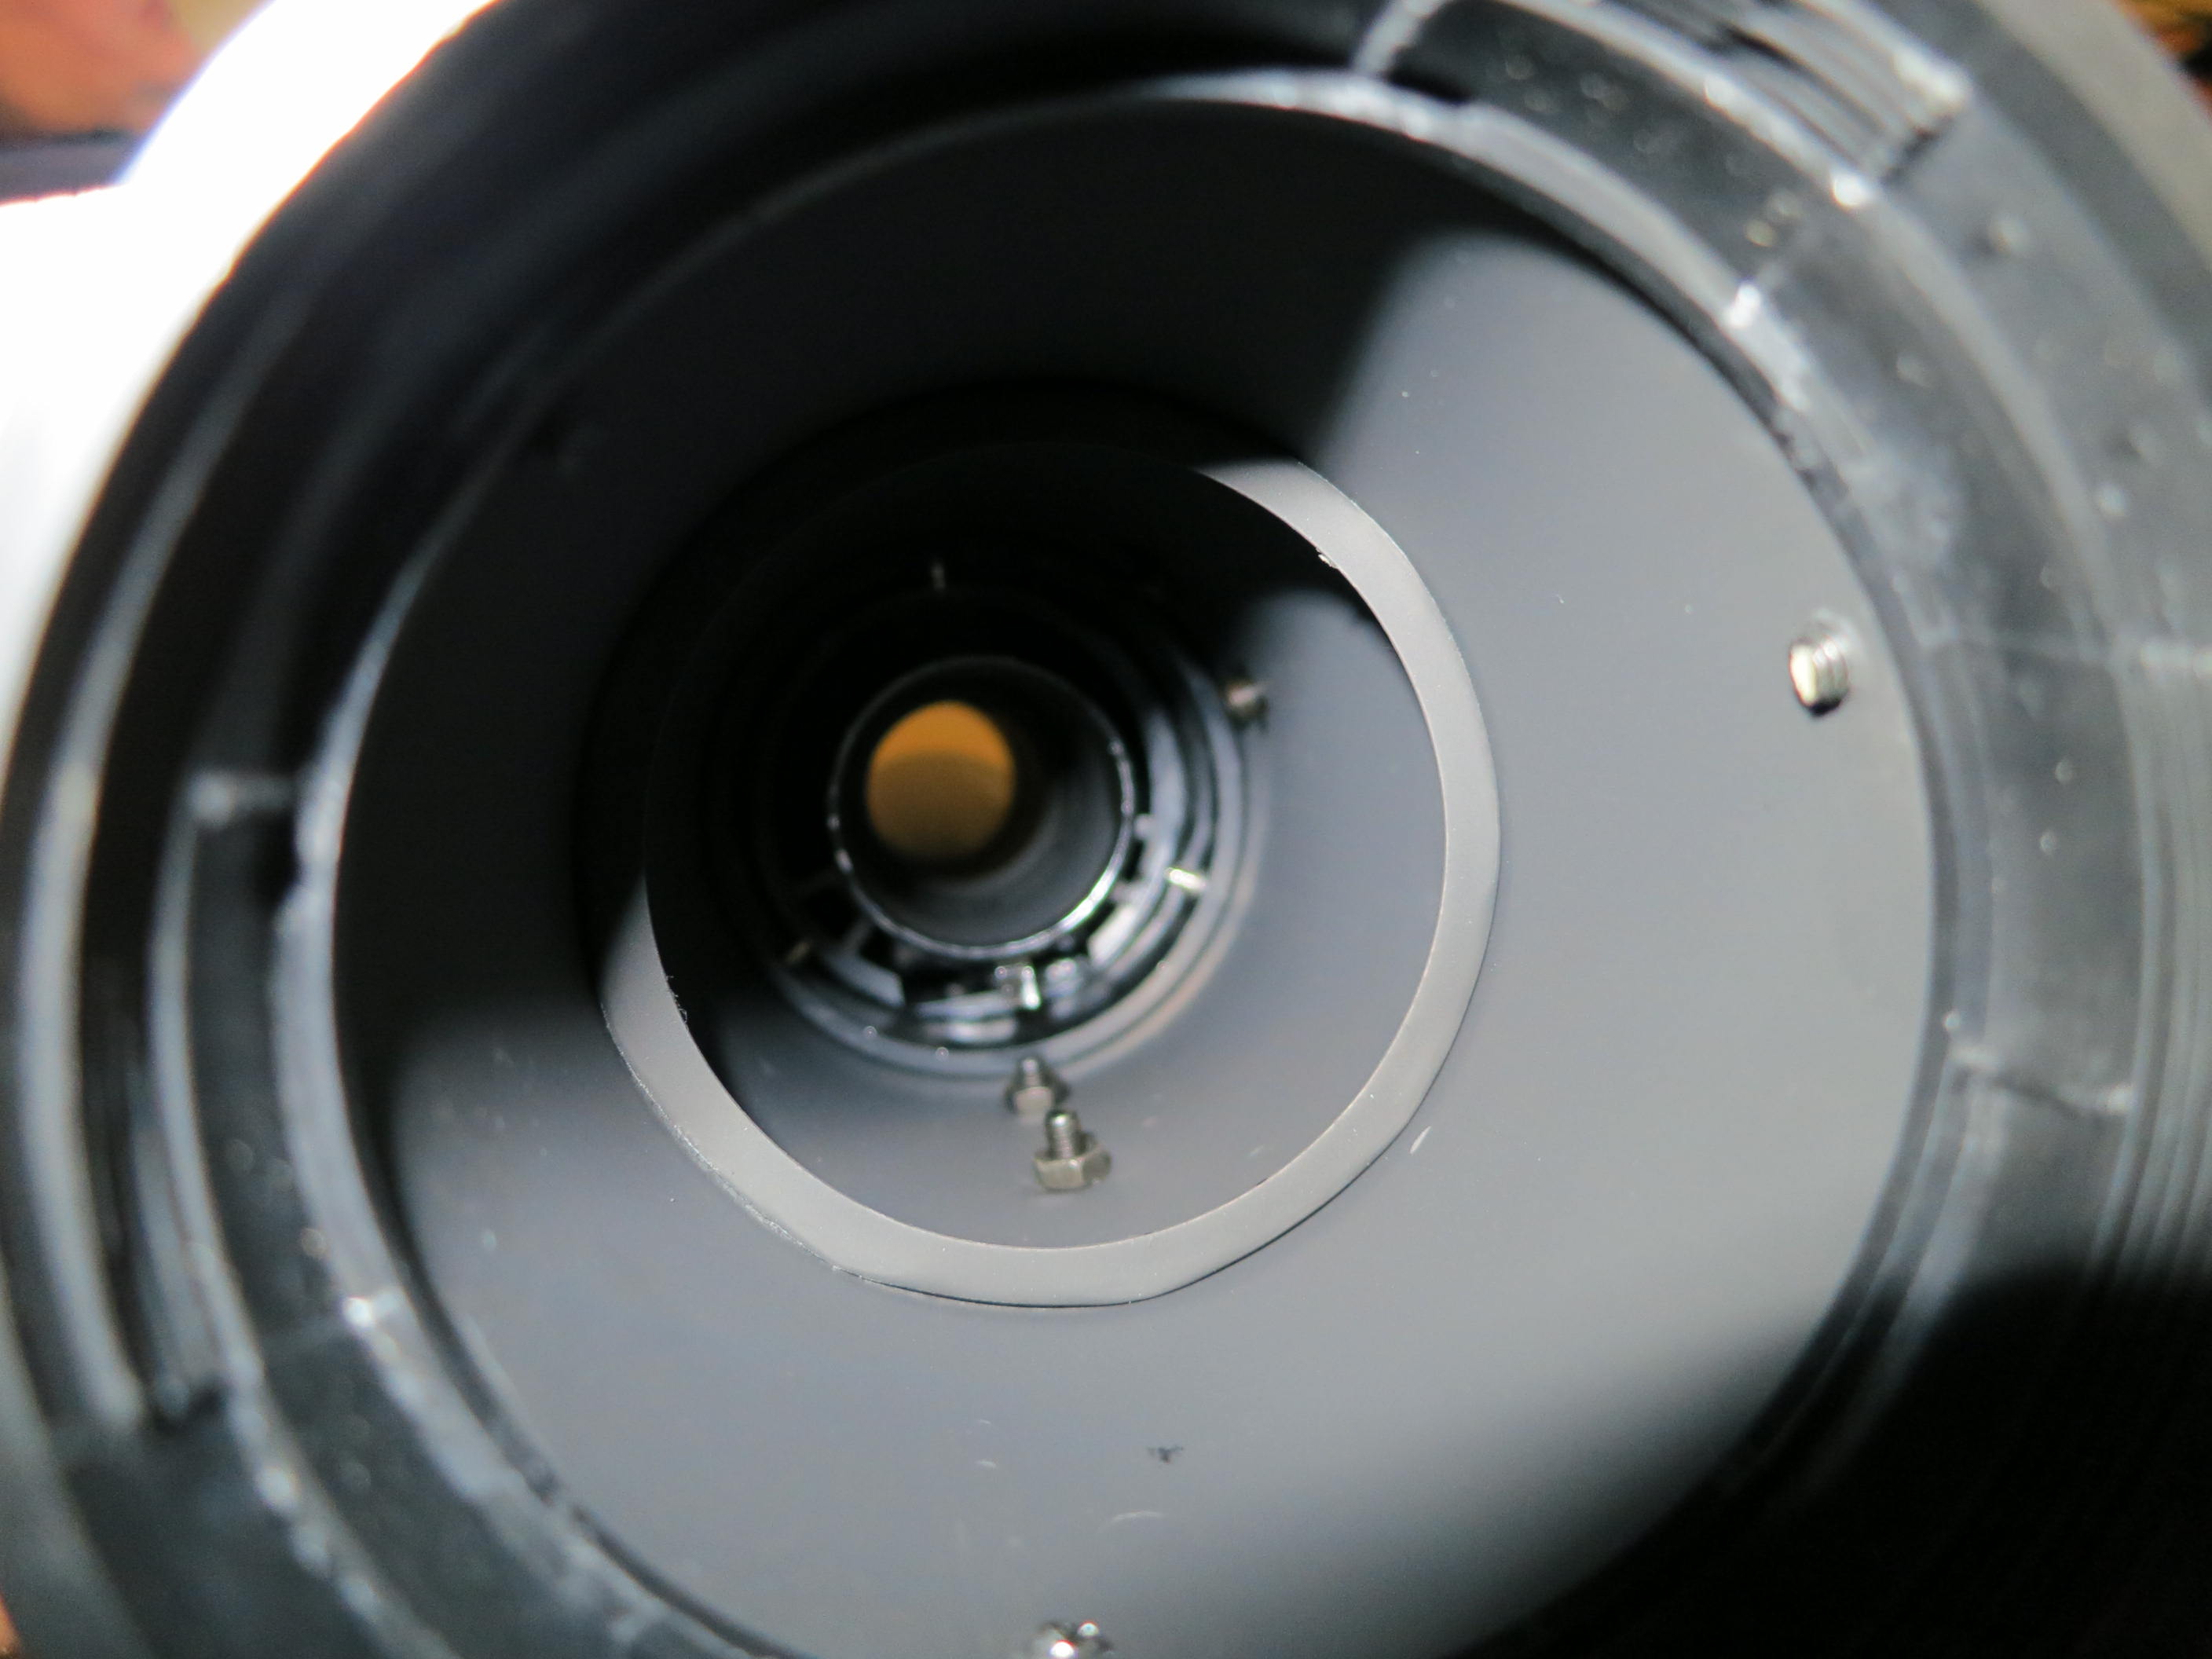
The  big news was that I was rolling with a new scope: a Celestron C102 f/10 achromatic refractor, one of the “screaming deal” scopes from this post. I put it on the SkyWatcher AZ4 (= Orion VersaGo II) alt-az mount where my Apex 127 Mak usually rides. The included dovetail on this scope is too small and too far forward to balance well with an optical finder and heavy eyepieces, so I sprung for the Explore Scientific tube rings and dovetail kit. That was a pretty darned good deal; tube rings alone for a 4-inch scope run $30-40, and a decent-length dovetail is another $15-20, but the ES kit has both for $45, plus a very convenient carry handle opposite the dovetail bar. With the rings in place I could mount my StellarVue SV50 as a finder, and I was ready to go.

IMG_0911

I also brought along the Apex 127 in case I felt like a change of pace, and because it takes up almost no room (which is one of the reasons I got it in the first place). But I was having too much fun with the C102 and the Apex 127 never made it out of the case. At some point I’ll have to do a detailed comparo between the two scopes, but Saturday night I was just out to have a good time.

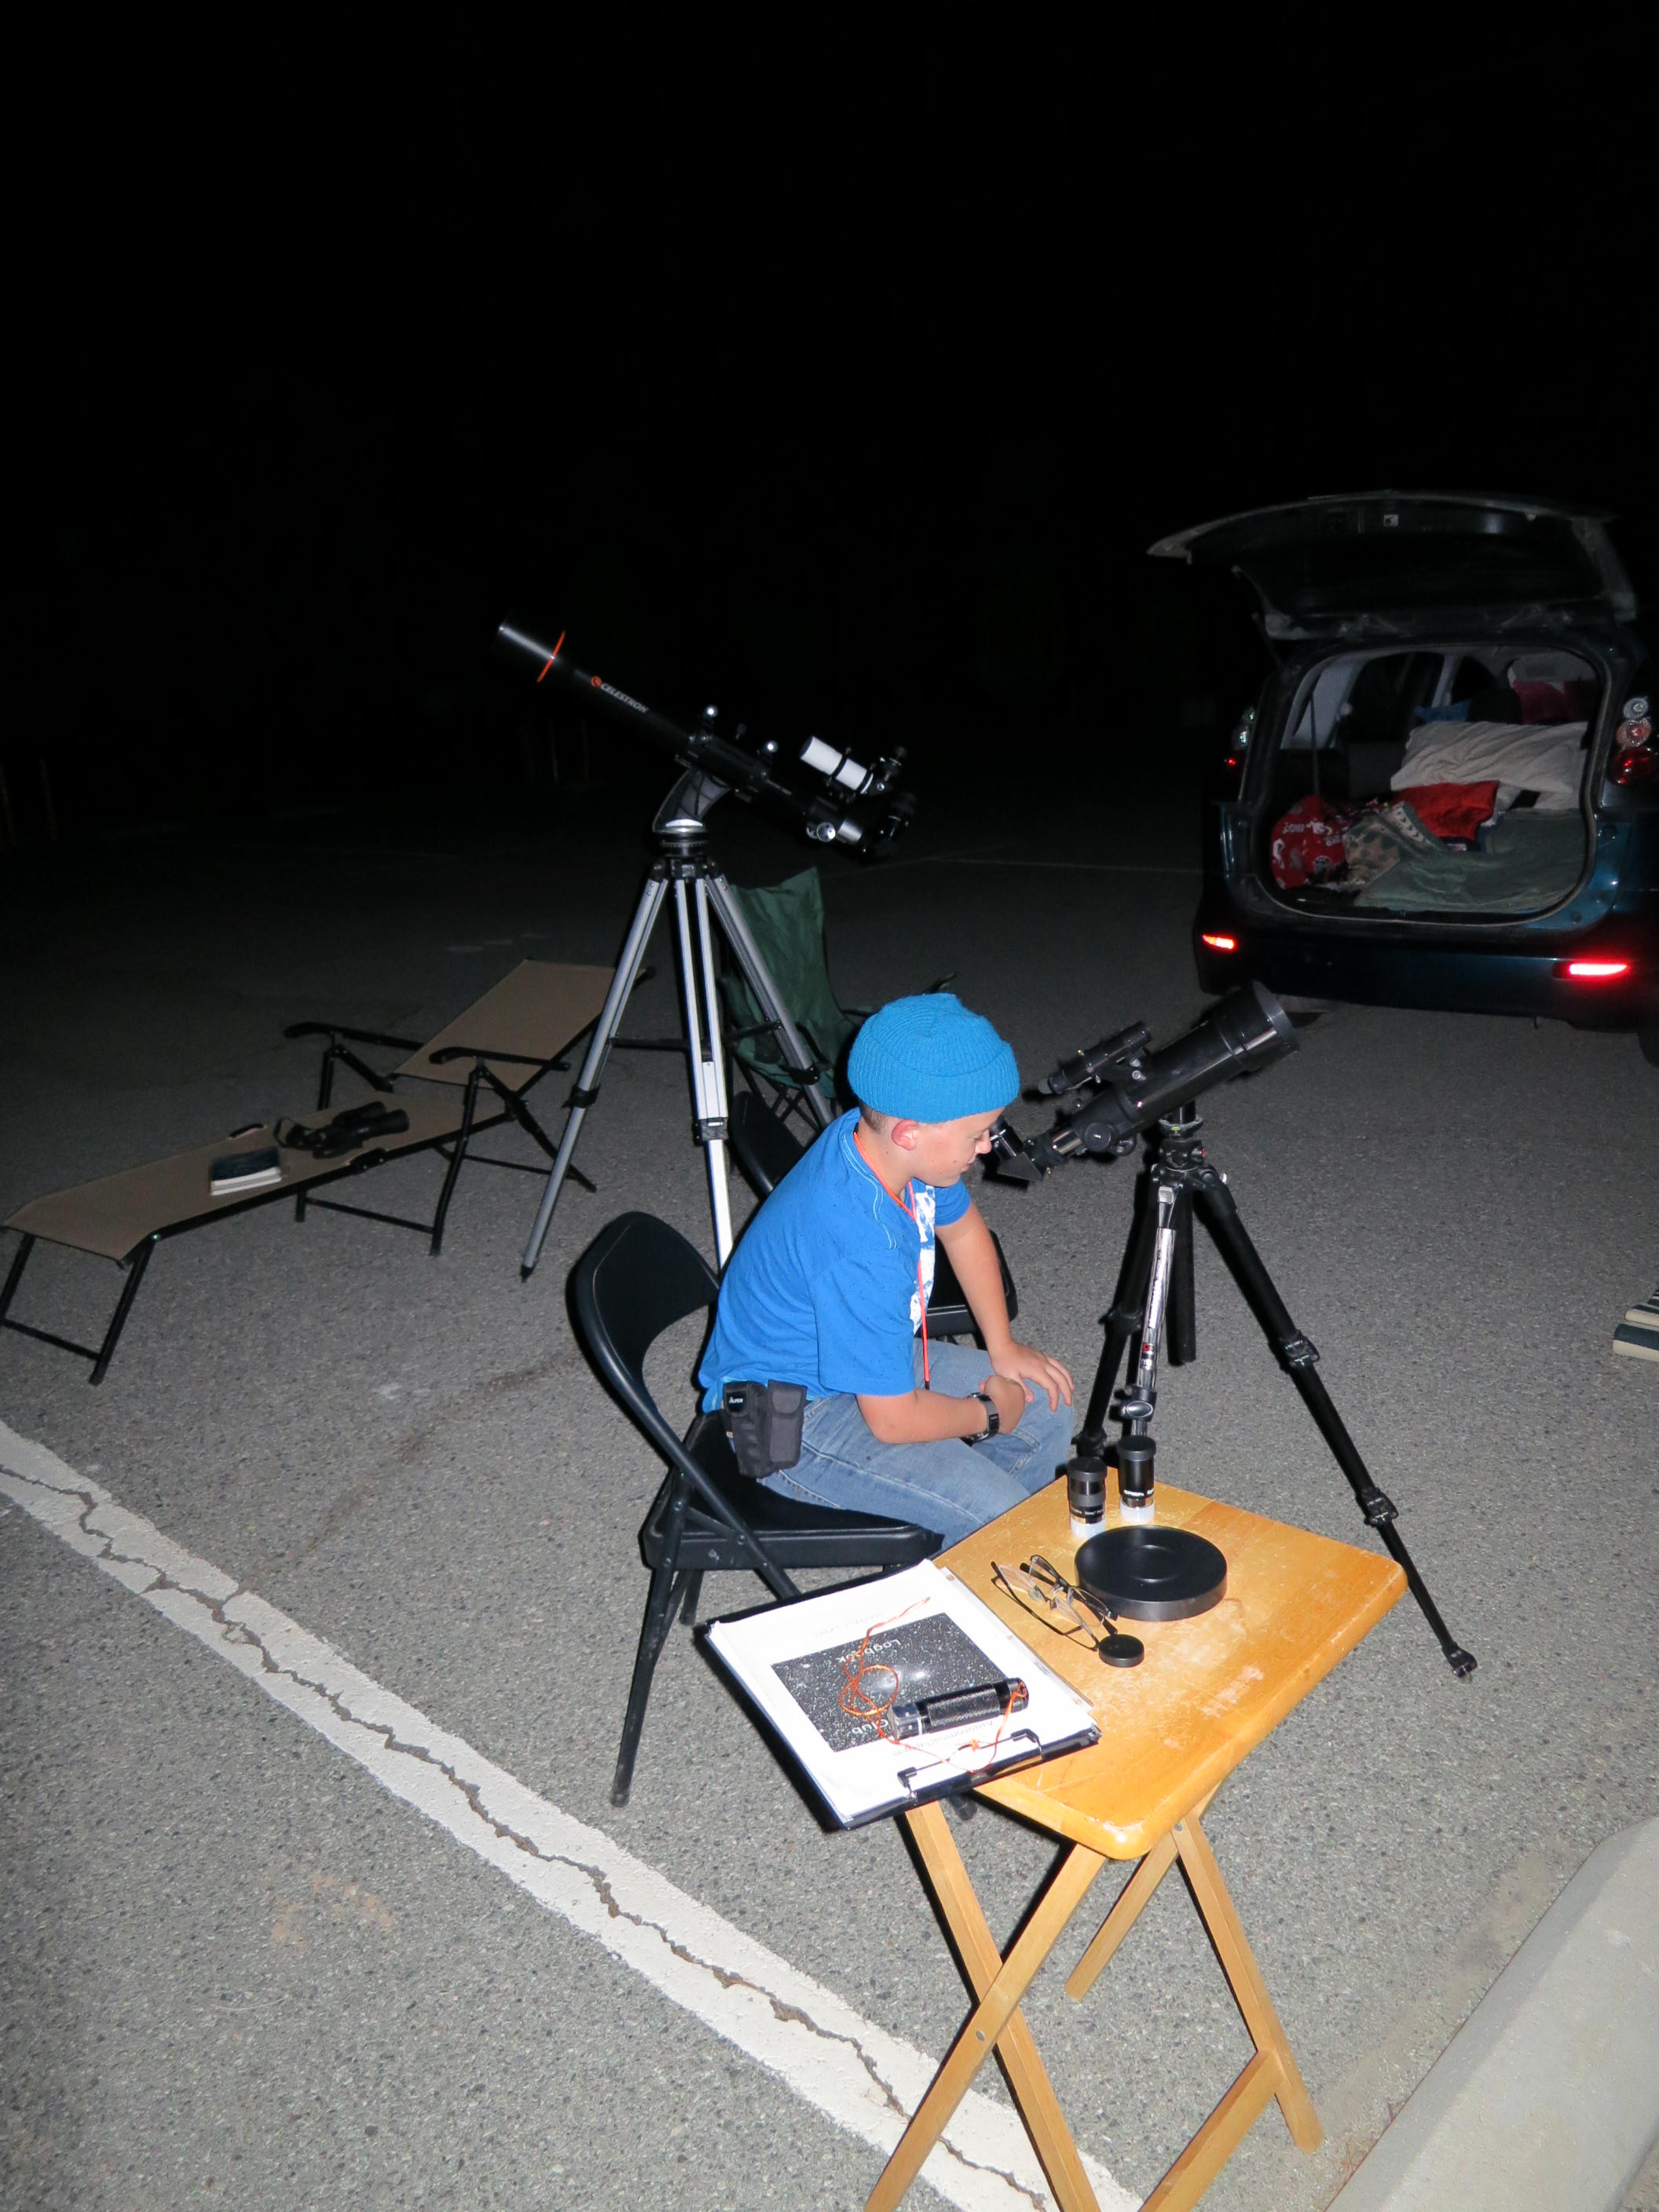
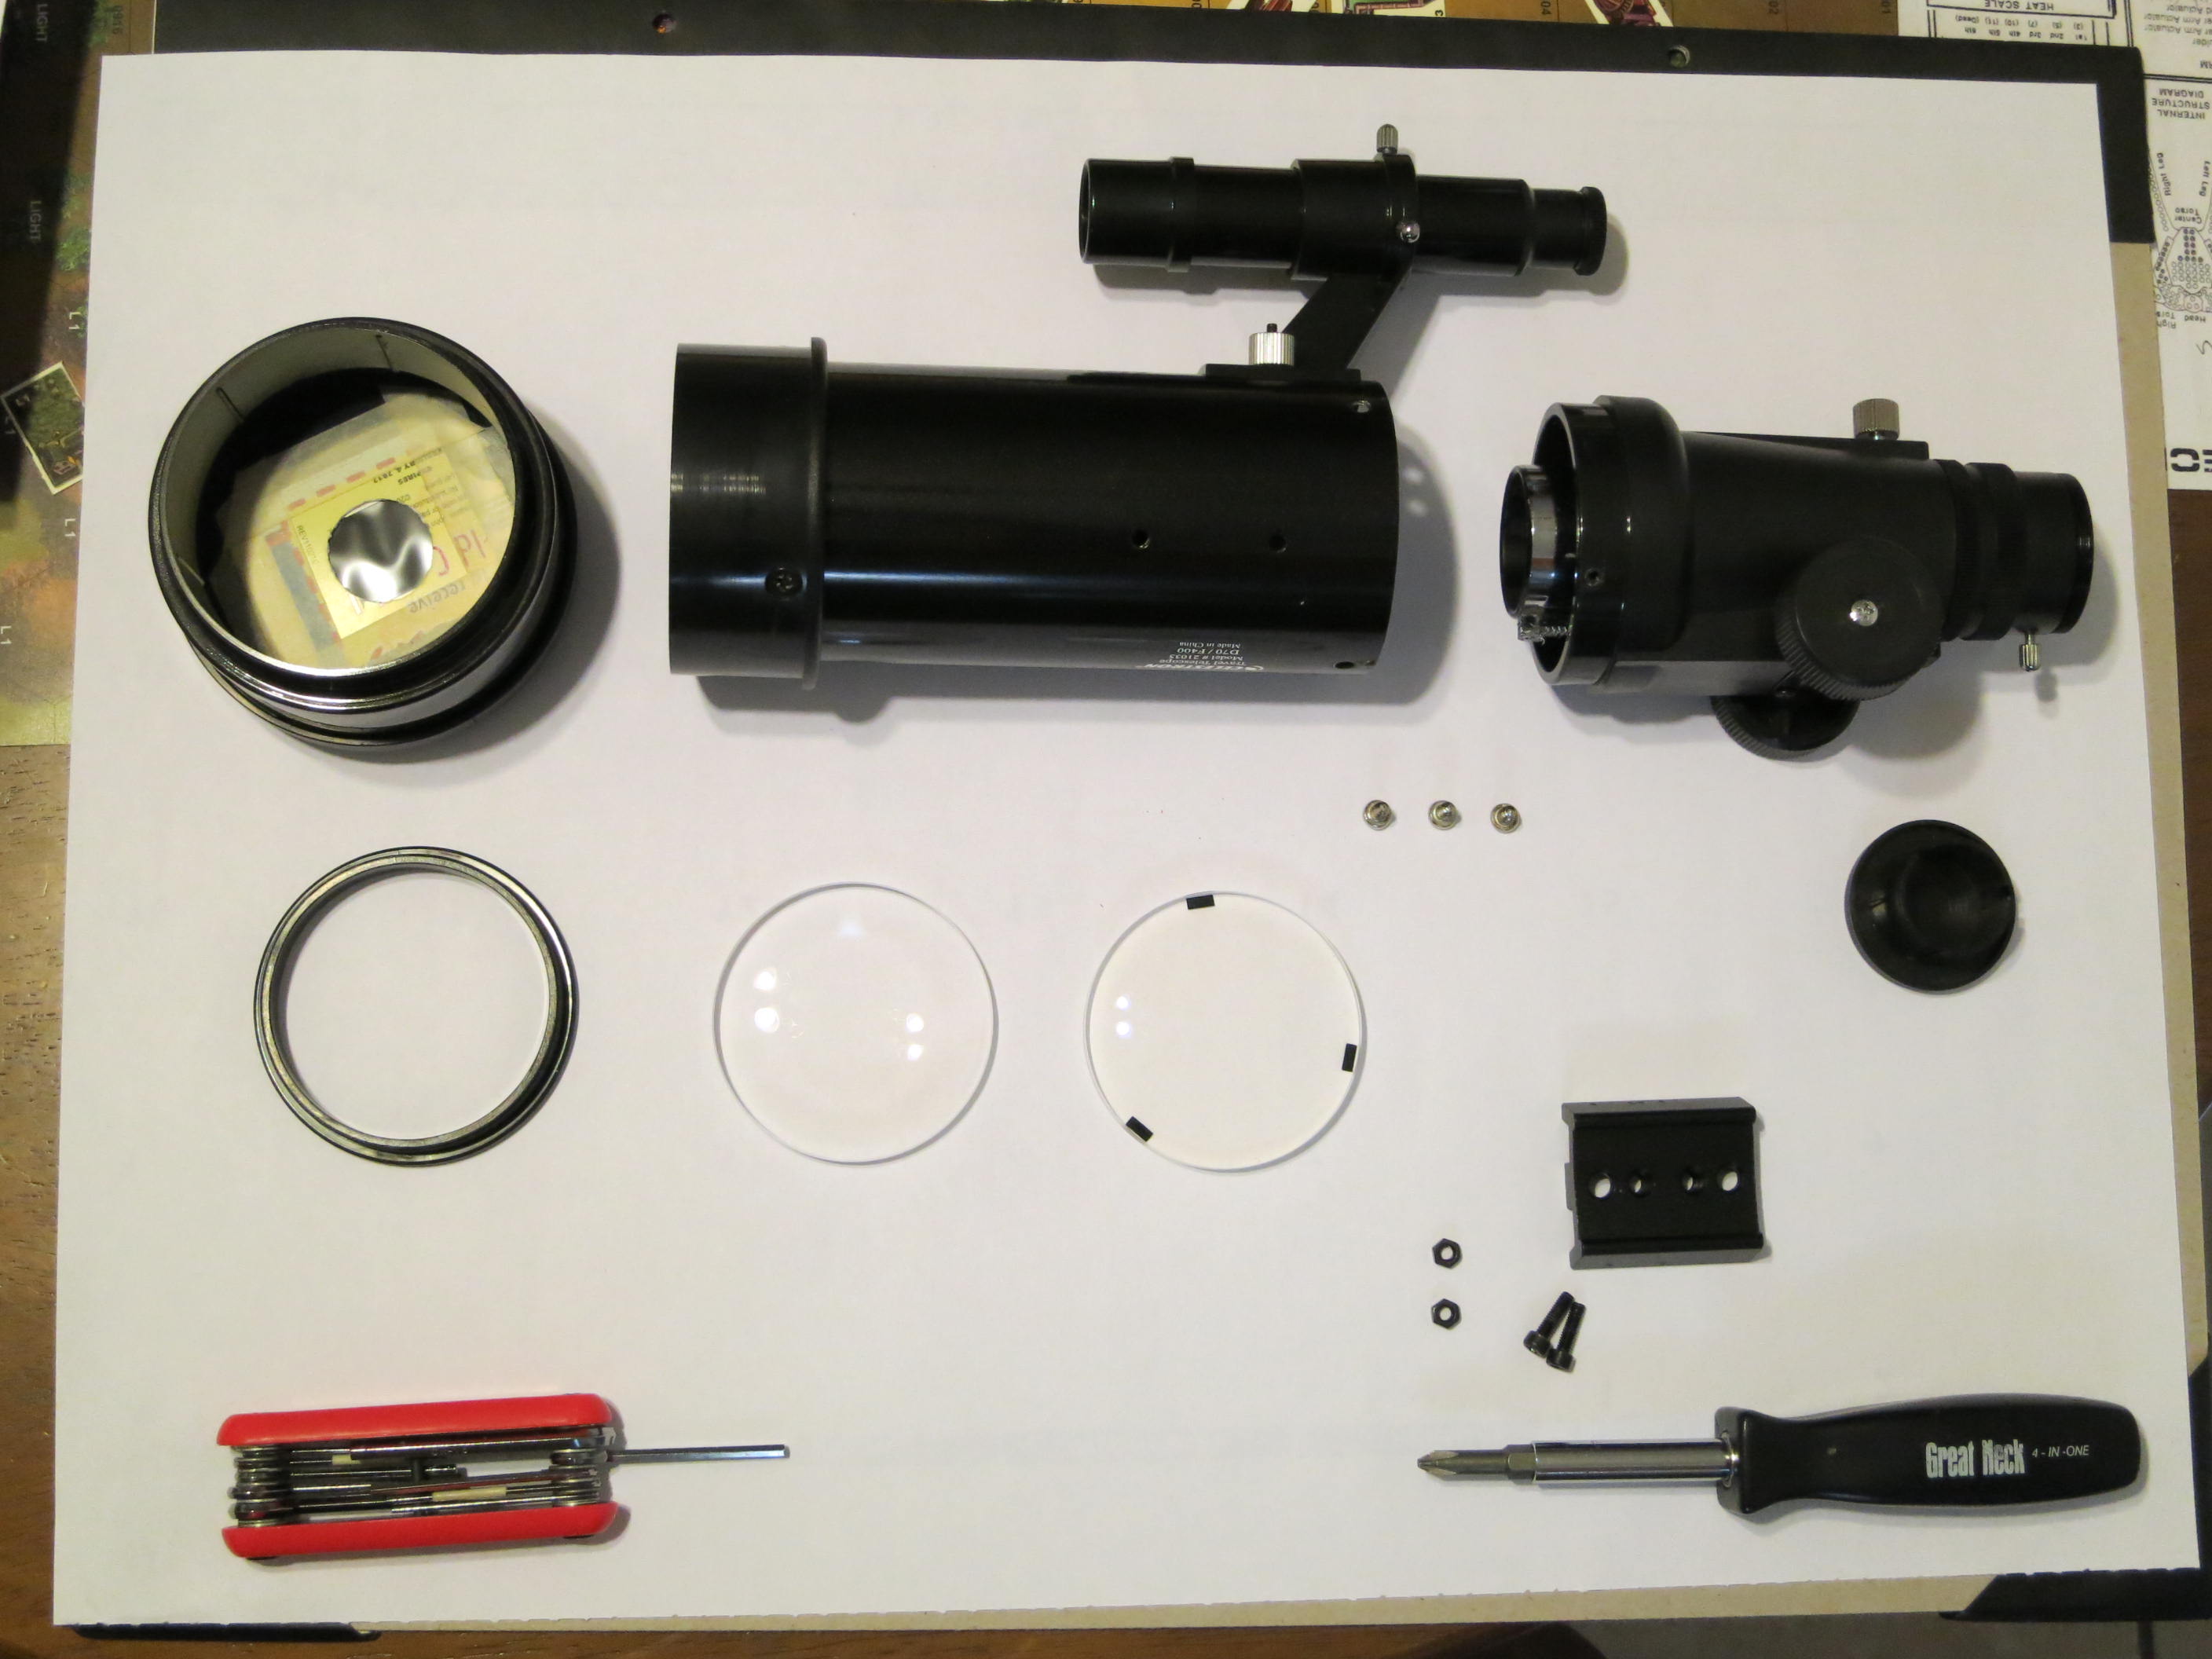
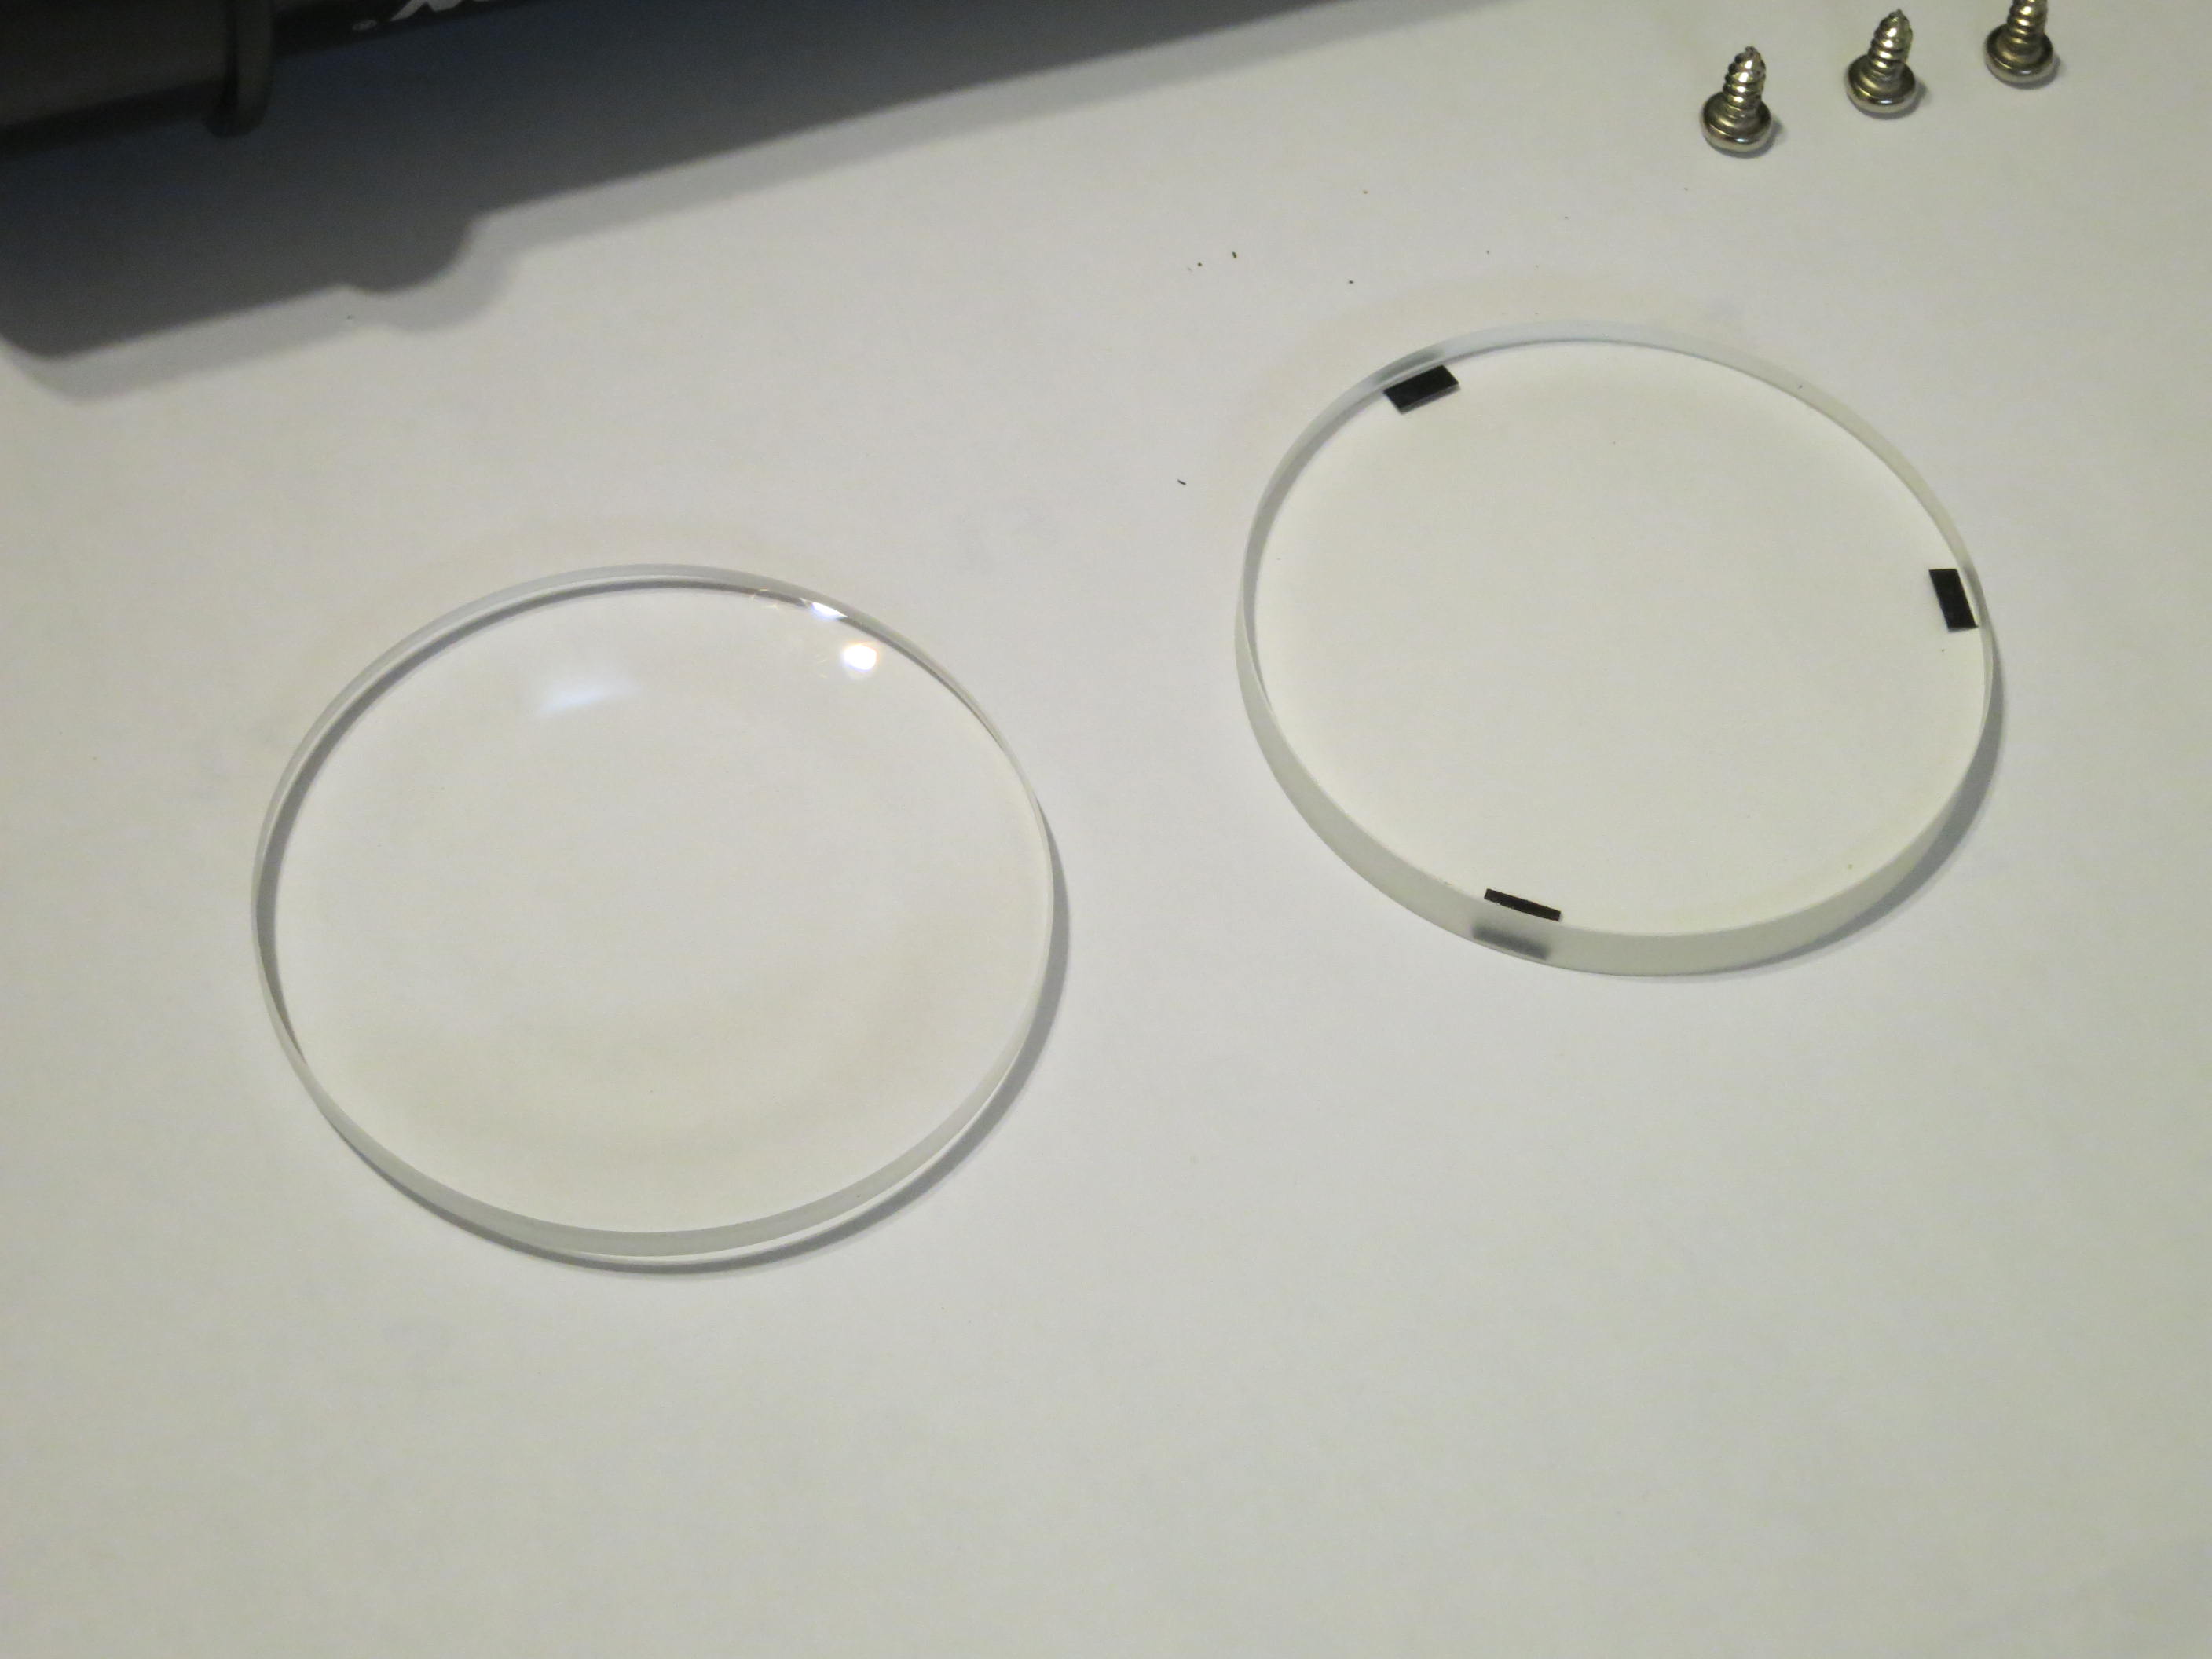
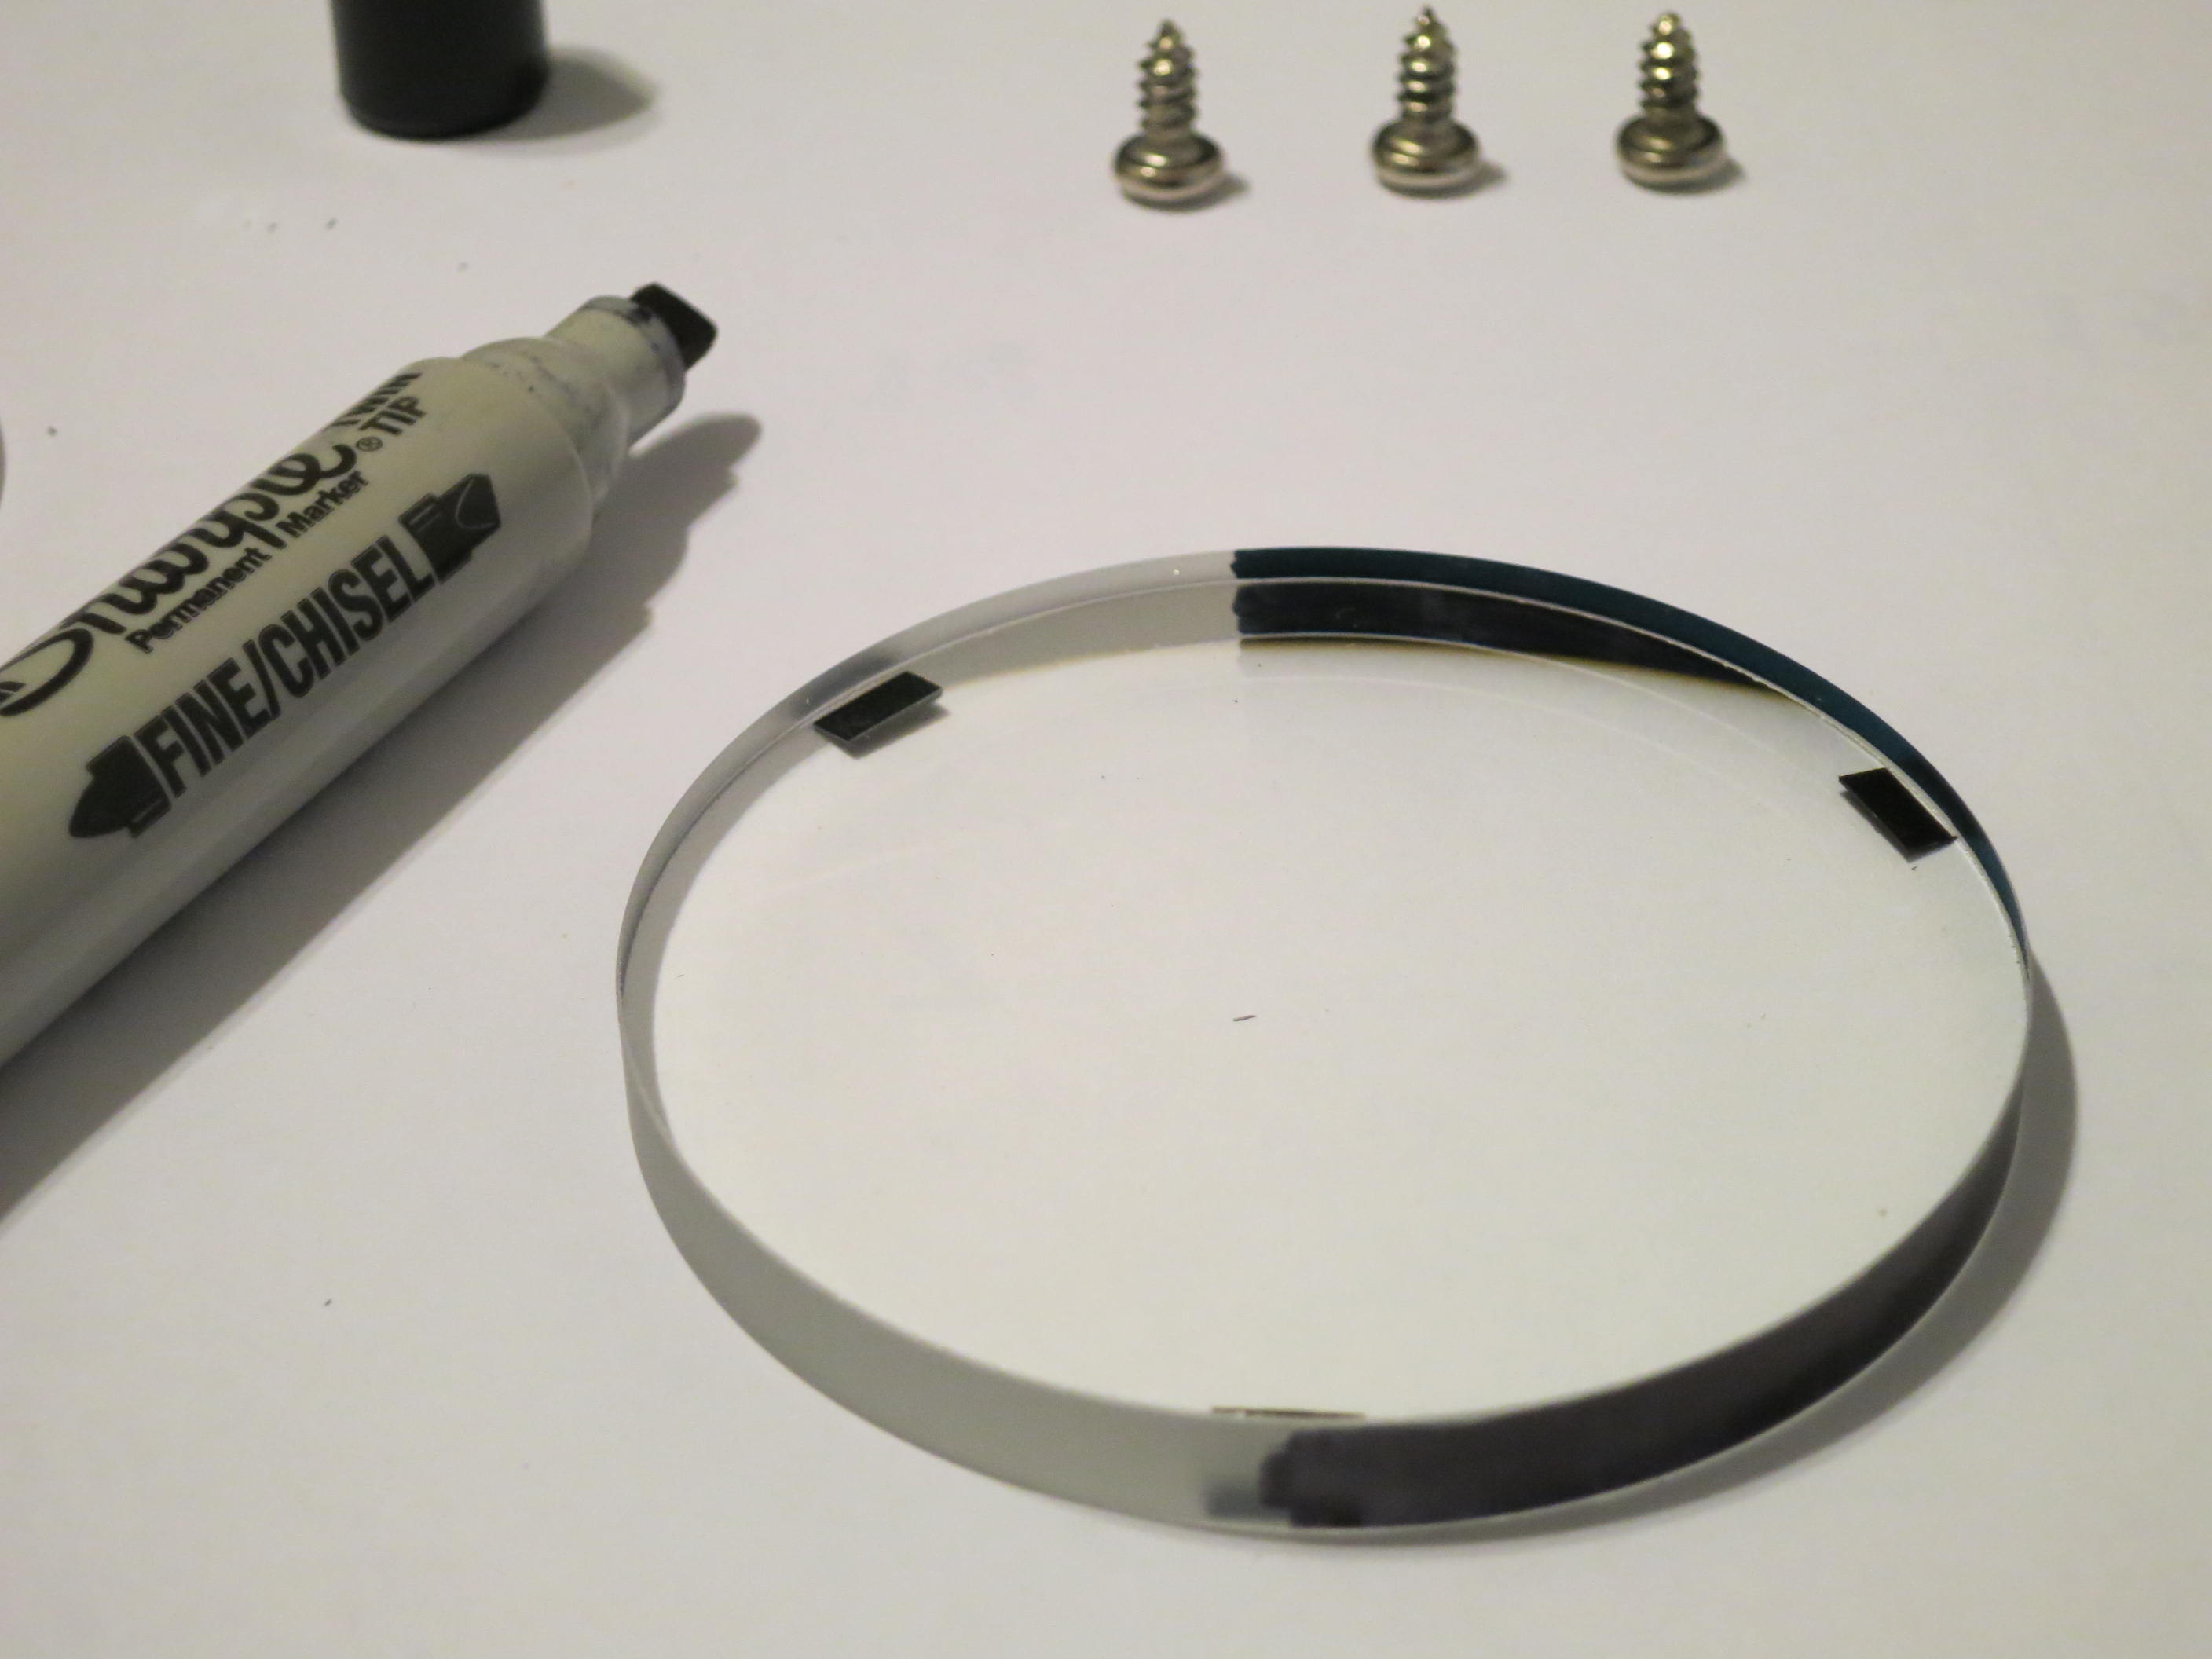
We also had along the Celestron Travel Scope 70, which London is using in the photo above. I had completely disassembled and reassembled that scope, and after London went to bed at 10:00 I divided my time about equally between the C102 and TS70. Partly I wanted to put both scopes through their paces, and partly I just wanted to hop around the sky, checking in on friends new and old.

C102 1st quarter moon 2013-10-11

I will have to do a full-on review of the C102 at some point. For now, suffice it to say that it is a very nice scope. Image brightness and contrast are both excellent; for someone who has spent most of his time observing with reflectors and catadioptrics, this does not feel like a 4-inch scope. On most objects I could have been fooled into thinking I was looking through a 5- or even 6-inch mirror scope.

Grain of salt: I didn’t actually go back and forth between this scope and 5- or 6-inch mirror scope, although I plan to do that in the future. I’m just saying that as someone who has spent a lot of time looking through smallish Newts and Maks, this scope felt like it punched above its weight. I was worried that I would feel like I was missing out by taking such a small scope as my main instrument. But I was having so much fun with it that I stayed up nearly to dawn–there were always two or three more things I wanted to check out.

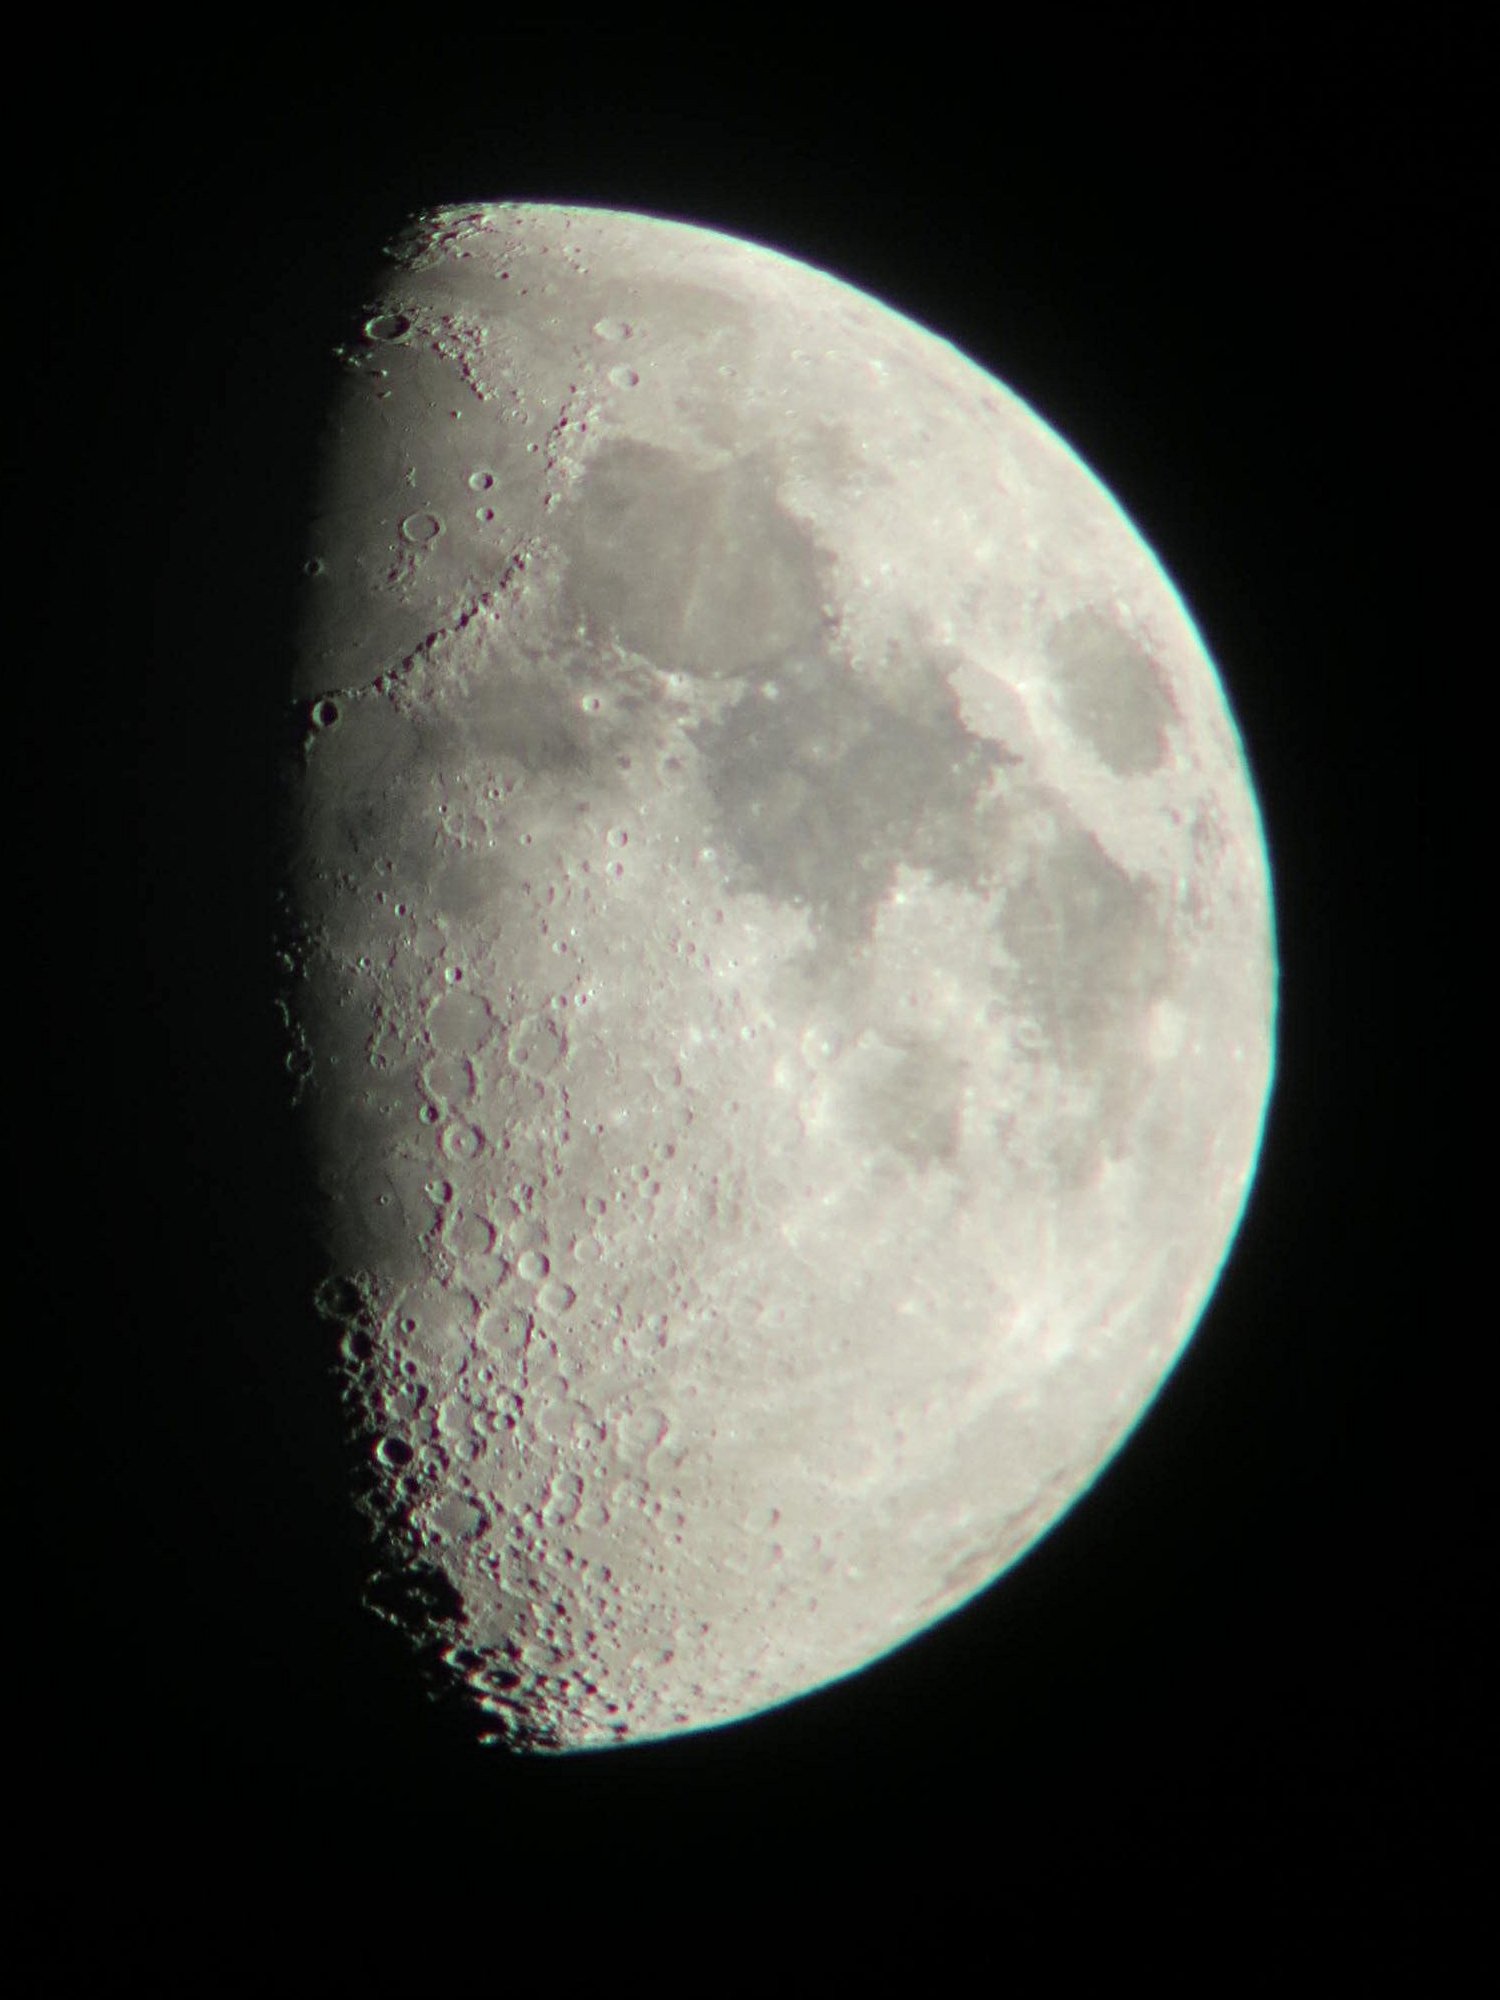
The photo above is not from Saturday night but from my driveway on Friday night, when the moon was exactly at first quarter. I flip-flopped it left to right and lightly sharpened it in GIMP, but didn’t fiddle with the brightness or color. There is some false color, most notably along the limb of the moon and on bright planets like Jupiter, but I didn’t find it objectionable. YMMV.

Salton moonset composite 2013-10-13

I think this is my new favorite moon scope. The image is so contrasty, details just pop. I would put in the 6mm Expanse (167x), watch the moon drift across the field of view, and pretend I was an astronaut. I also sketched a really nice catena (crater chain) in the northeast quadrant of the crater Deslandres. You can see it on the right in this LPOD image, opposite the smaller crater Hell that sits in the western part of Deslandres. If this catena has a name, I haven’t discovered it yet; feel free to enlighten me in the comments.

The moon set precisely at 1:00 AM. As you can see from the above composite, the seeing was not fantastic, especially near the horizon. Stars were visibly twinkling below about 45 degrees elevation.

After the moon set, it was like a whole new sky. The Milky way fairly blazed, and the sky was so full of bright stars that it was almost overwhelming. I was about as happy as I have ever been.

IMG_0948

I spent some time observing near the zenith. This can be a pain with a long-tube scope like the C102. You can extend the tripod legs to put the eyepiece at a convenient height, but then you’re futzing with tripod legs all night long, which I loathe doing (another reason I got the Apex 127 was that I can go from horizon to zenith at one tripod setting). I remembered David DeLano saying that he often sits on the ground to observe at high angles, and that led to some experimentation. I found that my range of comfortable sitting eyepiece heights overlaps with my comfortable kneeling eyepiece heights, so I put out a camp pad for my knees and a folding chair for my elbows and voila. Someday I will build or buy an adjustable observing chair, but until then, this will do.

IMG_0949

I have a couple collapsible camp chairs. They are great for stashing eyepieces when I’m really rolling, because I don’t have to worry about them falling over and rolling off onto the ground like I would with a table. I keep my eyepiece case on a picnic table, well back from the edge, so there’s no real opportunity to knock it over.

Now that I have some nice Explore Scientific widefields, I have become a bit of an eyepiece snob. Early in the evening I was sharing views with London and people from a nearby campsite so I started with my “second string” of Orion Stratuses and Plossls, just in case. Sound like a jerk move? Just wait until some kid–or a grown-up relative, in my case–says, “Hey, do I look here?”, and stabs the eye lens of your favorite eyepiece with a greasy fingertip.

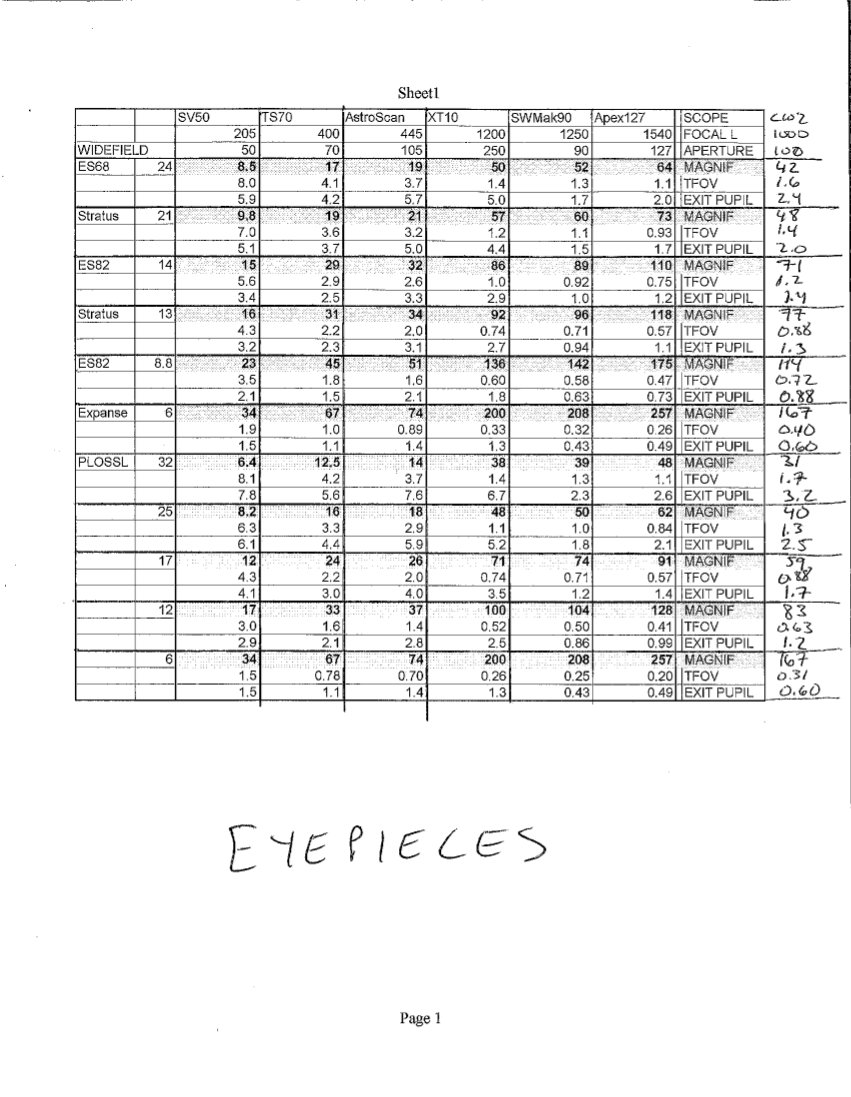
But I guess the joke’s on me because the views through the second string EPs were so good that I never got around to hauling out the ES models. My lineup for Saturday night included:

  • 32mm Plossl (31x, 1.7 degree true field of view) for lowest magnification and maximum true field in a 1.25″ EP (I don’t have a 2″ diagonal yet so my 38mm AstroTech Titan, which would go even lower and wider, stayed home);
  • 25mm Plossl (40x, 1.3 degrees);
  • 21mm Stratus (48x, 1.4 degrees)–comparing this to the 25mm Plossl illustrates one of the nice things about widefields: you can get higher magnification (bigger image scale) and a larger true field (more actual celestial real estate) at the same time;
  • 13mm Stratus (77x, 0.88 degrees);
  • 12mm Plossl (83x, 0.63 degrees);
  • 6mm Expanse (167x, 0.40 degrees).

You would think that the Stratuses would put the 25mm and 12mm Plossls out of business, since they give basically the same or better magnification and a bigger true field. But the Stratuses are quite a bit heavier than the Plossls and required rebalancing the scope. So I was either in Stratus mode or Plossl-and-Expanse mode, and over the course of the evening, the cheap eyepieces won out in terms of convenience.

Also, frankly, f/10 is a pretty forgiving focal ratio. With a light cone that shallow, practically any eyepiece is going to do well. The only reason to prefer widefields is for their actual wide fields, and not to help control aberrations from the scope itself. I did note that the difference in apparent field of  view was immediately obvious when I bounced from the 52-degree Plossls to the 68-degree Stratuses. Oddly, I never noticed it with the 6mm Expanse (66 degrees), but I think that’s because I only used the Expanse to power up on the moon, planets, and double stars, where I was always fixated on whatever was at the center of the field.

My favorite observations of the night, in rough chronological order:

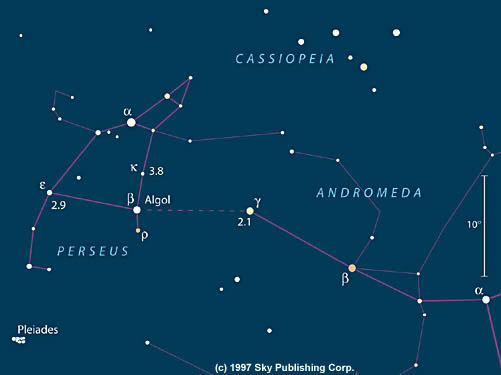
Double Cluster and Stock 2

I have waxed poetic about the Double Cluster before (you can find it here). It’s pretty close to a larger, sparser cluster called Stock 2, which is shown is most atlases, including the Pocket Sky Atlas. But I had never noticed the chain of bright stars that connects Stock 2 and the Double Cluster, and I had also not picked up the stick figure in the center of Stock 2. Here’s a photo by Doug Scobel of the University of Michigan Lowbrow Astronomers (borrowed from here) that shows what I mean (lower image GIMPed by me):

Double_Cluster_Stock2

I revisited the Double Cluster periodically throughout the night. Right after dark it was the second thing I looked at, after the moon, and it was my last object before I packed up at 5:40 AM. Probably my best view was at 3:00 AM, when I wrote:

Nicely framed, mesmerizingly beautiful. I see at least two red stars in more easterly cluster, NGC 884. NGC 869 is at end of chain to Stock 2. All at 31x.

I still do plan to get into astronomical sketching, and when I do, I reckon the Double Cluster will be one of my first targets, if not my very first.

Andromeda Galaxy (M31) and satellite galaxies (M32 and M110)

Also about 3:00 AM, immediately before the Double Cluster observation above:

With 32mm Plossl (31x), all three galaxies fit in field, with dust lane popping in and out in averted vision.

I should mention that M31 itself was too big to fit into the field of view of my lowest-power eyepiece; with the core of the galaxy centered in the field, the edges of the spiral arms went out of the field in both directions. M31 is so darned big that unless you have an instrument with a 3-degree true field, you just can’t see all of it at once. Corollary: if you can fit the galaxy into a smaller field of view, then you’re not seeing all of it, which is sadly the case under even moderate light pollution. The core will punch through even vile city lights, but the spiral arms just die out.

Jupiter

Best view was at 5:00 AM, with the 12mm Plossl (83x):

Bands not quite lined up with moons. NEB [North Equatorial Belt] seems narrower and better defined than SEB. Several distinct belts to north, single broad ?temperate belt to south. Max detail at this mag–at 187x, seeing is too mushy.

Zodiacal light

I stopped about 5:10 for a biology break. Walking back to the telescope, I was stopped in my tracks by what seemed to be a second Milky Way: a broad band of light stabbing up from the eastern horizon, past Mars and the Beehive (M44) and reaching almost to Jupiter, which was by then high in the sky. It took me a minute to realize that this was the zodiacal light: the cumulative effect of sunlight reflecting off of countless grains of dust in the ecliptic plane of the solar system. The name “zodiacal light” comes from the fact that this light is always found along the zodiacal path traced by the sun, moon, and planets, as it must be, since almost everything in the solar system orbits in roughly the same ecliptic plane (comets excepted–they can come in from any angle, and the fact that they do so was one of the first clues to the existence of the Oort Cloud).

The Gegenschein, which I saw at the 2010 All-Arizona Star Party, is another manifestation of the same phenomenon. Basically, the Gegenschein comes from “full” dust grains exactly opposite the sun in the sky, and the zodiacal light comes from “crescent” or “gibbous” dust grains at other angles. Apparently under the very darkest skies, the Gegenschein can be seen as a bright patch in an arc of zodiacal light that stretches overhead from horizon to horizon. I have not seen that, but it’s on my bucket list.

Anyway, given how bright the zodiacal light was Sunday morning, I think I must have seen it many times before and simply not recognized it. I will keep my eyes peeled in the future.

M81 and M82

Anytime I’ve got more than one bright galaxy in the eyepiece, I’m a happy man. These two were nicely framed in the 32mm Plossl (31x). Using the 12mm Plossl (83x), the gravitationally-tortured M82 showed some hints of detail in averted vision.

The Odd Couple–M97 and M108

Probably my favorite pair of Messier objects. M97, the Owl Nebula, is a planetary nebula, a single dying star, about 2000 light years from Earth–right next door, cosmically speaking. M108 is a spiral galaxy in the Ursa Major galaxy cluster, about 46 million light years away, roughly the same size as the Milky Way and containing perhaps half a trillion stars. So one of these things is 23,000 times farther than the other one, and several hundred billion times more massive. If M97 was a ping-pong ball held at arms length, M108 would be a frisbee half a mile wide, located 8.5 miles away. But they look about the same in the telescope in terms of size and brightness, and you can frame them in the same low-power field of view, as I did at 5:27 AM on Sunday.

(Incidentally, I just discovered that Google will convert megaparsecs to light years–handy!)

IMG_0959

After visiting M97 and M108, I had a quick peek at Mars. The red planet is very distant right now, on the opposite side of the sun from us, but it was visibly a disk and not just a point even at low magnification. The disk was most clear at 83x in the 12mm Plossl, but the planet was just flaming in the lousy seeing and I couldn’t make out any details.

Speaking of Mars, our rover Opportunity landed in January, 2004, and is therefore more than nine-and-a-half years into its 90-day mission. Not bad.

After Mars I briefly revisited the Double Cluster, but I could tell that my eyes and brain were no longer operating at anything like peak capacity. So I closed everything down and got a couple of hours of rack. The photo above shows my super-fancy telescope protection system. There are dedicated protective covers for telescopes that will work in rain, sleet, and hail, but hell, if conditions get that bad I will pull the scope inside the car. I didn’t just pack it up because I wanted to do a little birding with it in the morning.

IMG_0967

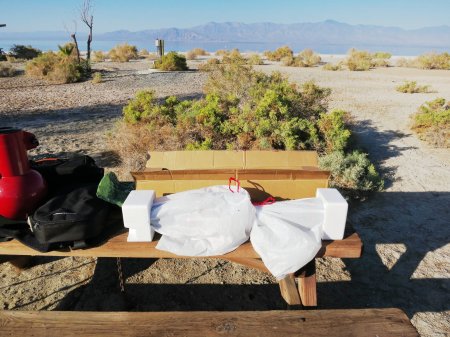
We  did spend some time birding, and then while London got the campfire going, I started packing up. I do have a nice padded case for the telescope en route from Amazon–this one, recommended by David DeLano–but it’s not here yet so I used the trash bags and the packing materials the scope came in.

IMG_0970

London stayed busy with the Travel Scope 70, which had gotten a workout overnight on the moon, Jupiter, and the deep sky. I have another post coming about the reborn TS70–stay tuned.

IMG_0968

One last thing: Reese’s peanut butter cups make fantastic s’mores, and if you have any left over, they are great in pancakes, too.

All in all,  it was a fantastic night, one of my best–and longest–nights of stargazing of all time. At 3:30 I stopped observing to sit at one of the picnic tables and eat a banana. The stars were so bright and the sky was so full of stuff to look at. When I got back to the telescope, I scrawled in my notebook, “Nights like this make me wonder why I bother to observe anywhere else.”