
Guest post: David DeLano’s ultimate Galileoscope quest, Part 2 – The Easy Solutions
February 24, 2014Welcome to the second post in David’s series on hot-rodding a Galileoscope. The rest of the posts in the series are here.
There are several easy modifications that can be made to the Galileoscope to make it more usable. This post is going to be short, but I decided to break these off separately and document them as a group, because they do need to be documented.

The first mod is to add a finder. Track down one with a 3/8″ rail. The BSA Daisy BB Gun Site works well, and is relatively inexpensive, but whatever you have on hand or can dig up will work. Fit it onto the front sight, and make sure it’s on as flat as possible. This probably means centering the sight between the screws that hold the finder to the rail. Tighten it snug, but so that it will slide back and forth. Slide it back and forth a few times, making sure to maintain the position on the sight. This will give you a bit of a groove for the rail cleats (I don’t know what else to call them) to ride in. Tighten it down a bit and repeat, a couple of times. Now tighten it as much as feasible, and it should stay firmly attached.
This next step is optional. Remove the sight, and take a nail file or a small saw and deepen the groove that you started on the sight. I highly recommend this, as it will give the finder a bit more grip and prevent it from coming loose, or tilting during use.
The Galileoscope kit does not come with a cover for the objective. It does have a nice dew shield, which also holds the two halves of the tube firmly around the objective, but no cover. I originally found that a plastic cap from a shipping tube, probably a 2″ size, fit nicely into the dew shield. However, I eventually figured out that a 70mm binocular cover is exactly the right size to go over the dew shield. The ones I use came from Agena Astro.

While you are still in mod mode, replace the O-rings that hold the tube together. In reality, the O-rings aren’t absolutely required, but because there is some stress in holding everything together, use the O-rings. I replaced mine with a bit of a heavier duty version measuring 1-5/8″ ID, 1-7/8″ OD, 1/8″ thick. They are a bit more difficult to install, but should hold up better over the long haul.
Be careful with the 1/4″-20 mounting nut on the bottom of the scope. If you over tighten when fastening to it, the nut will start to pull out of the tube halves, splitting them apart. This is one reason I recommend using the O-rings, as they are closer to the center of the scope. However, I highly recommend using finder rings instead. For one, if you are going to use the GS as a finder, you need to be able to align it to your telescope. Beyond that, it is a much more secure way to mount the GS. Be careful when tracking down the rings. You would think a 50mm to 60mm set of rings would work, but they are almost impossible to get over the front or rear sights, along with the block where the mount nut is located. Go with a 80mm to 90mm set, making sure that the minimum tube they can accommodate is around 55mm.
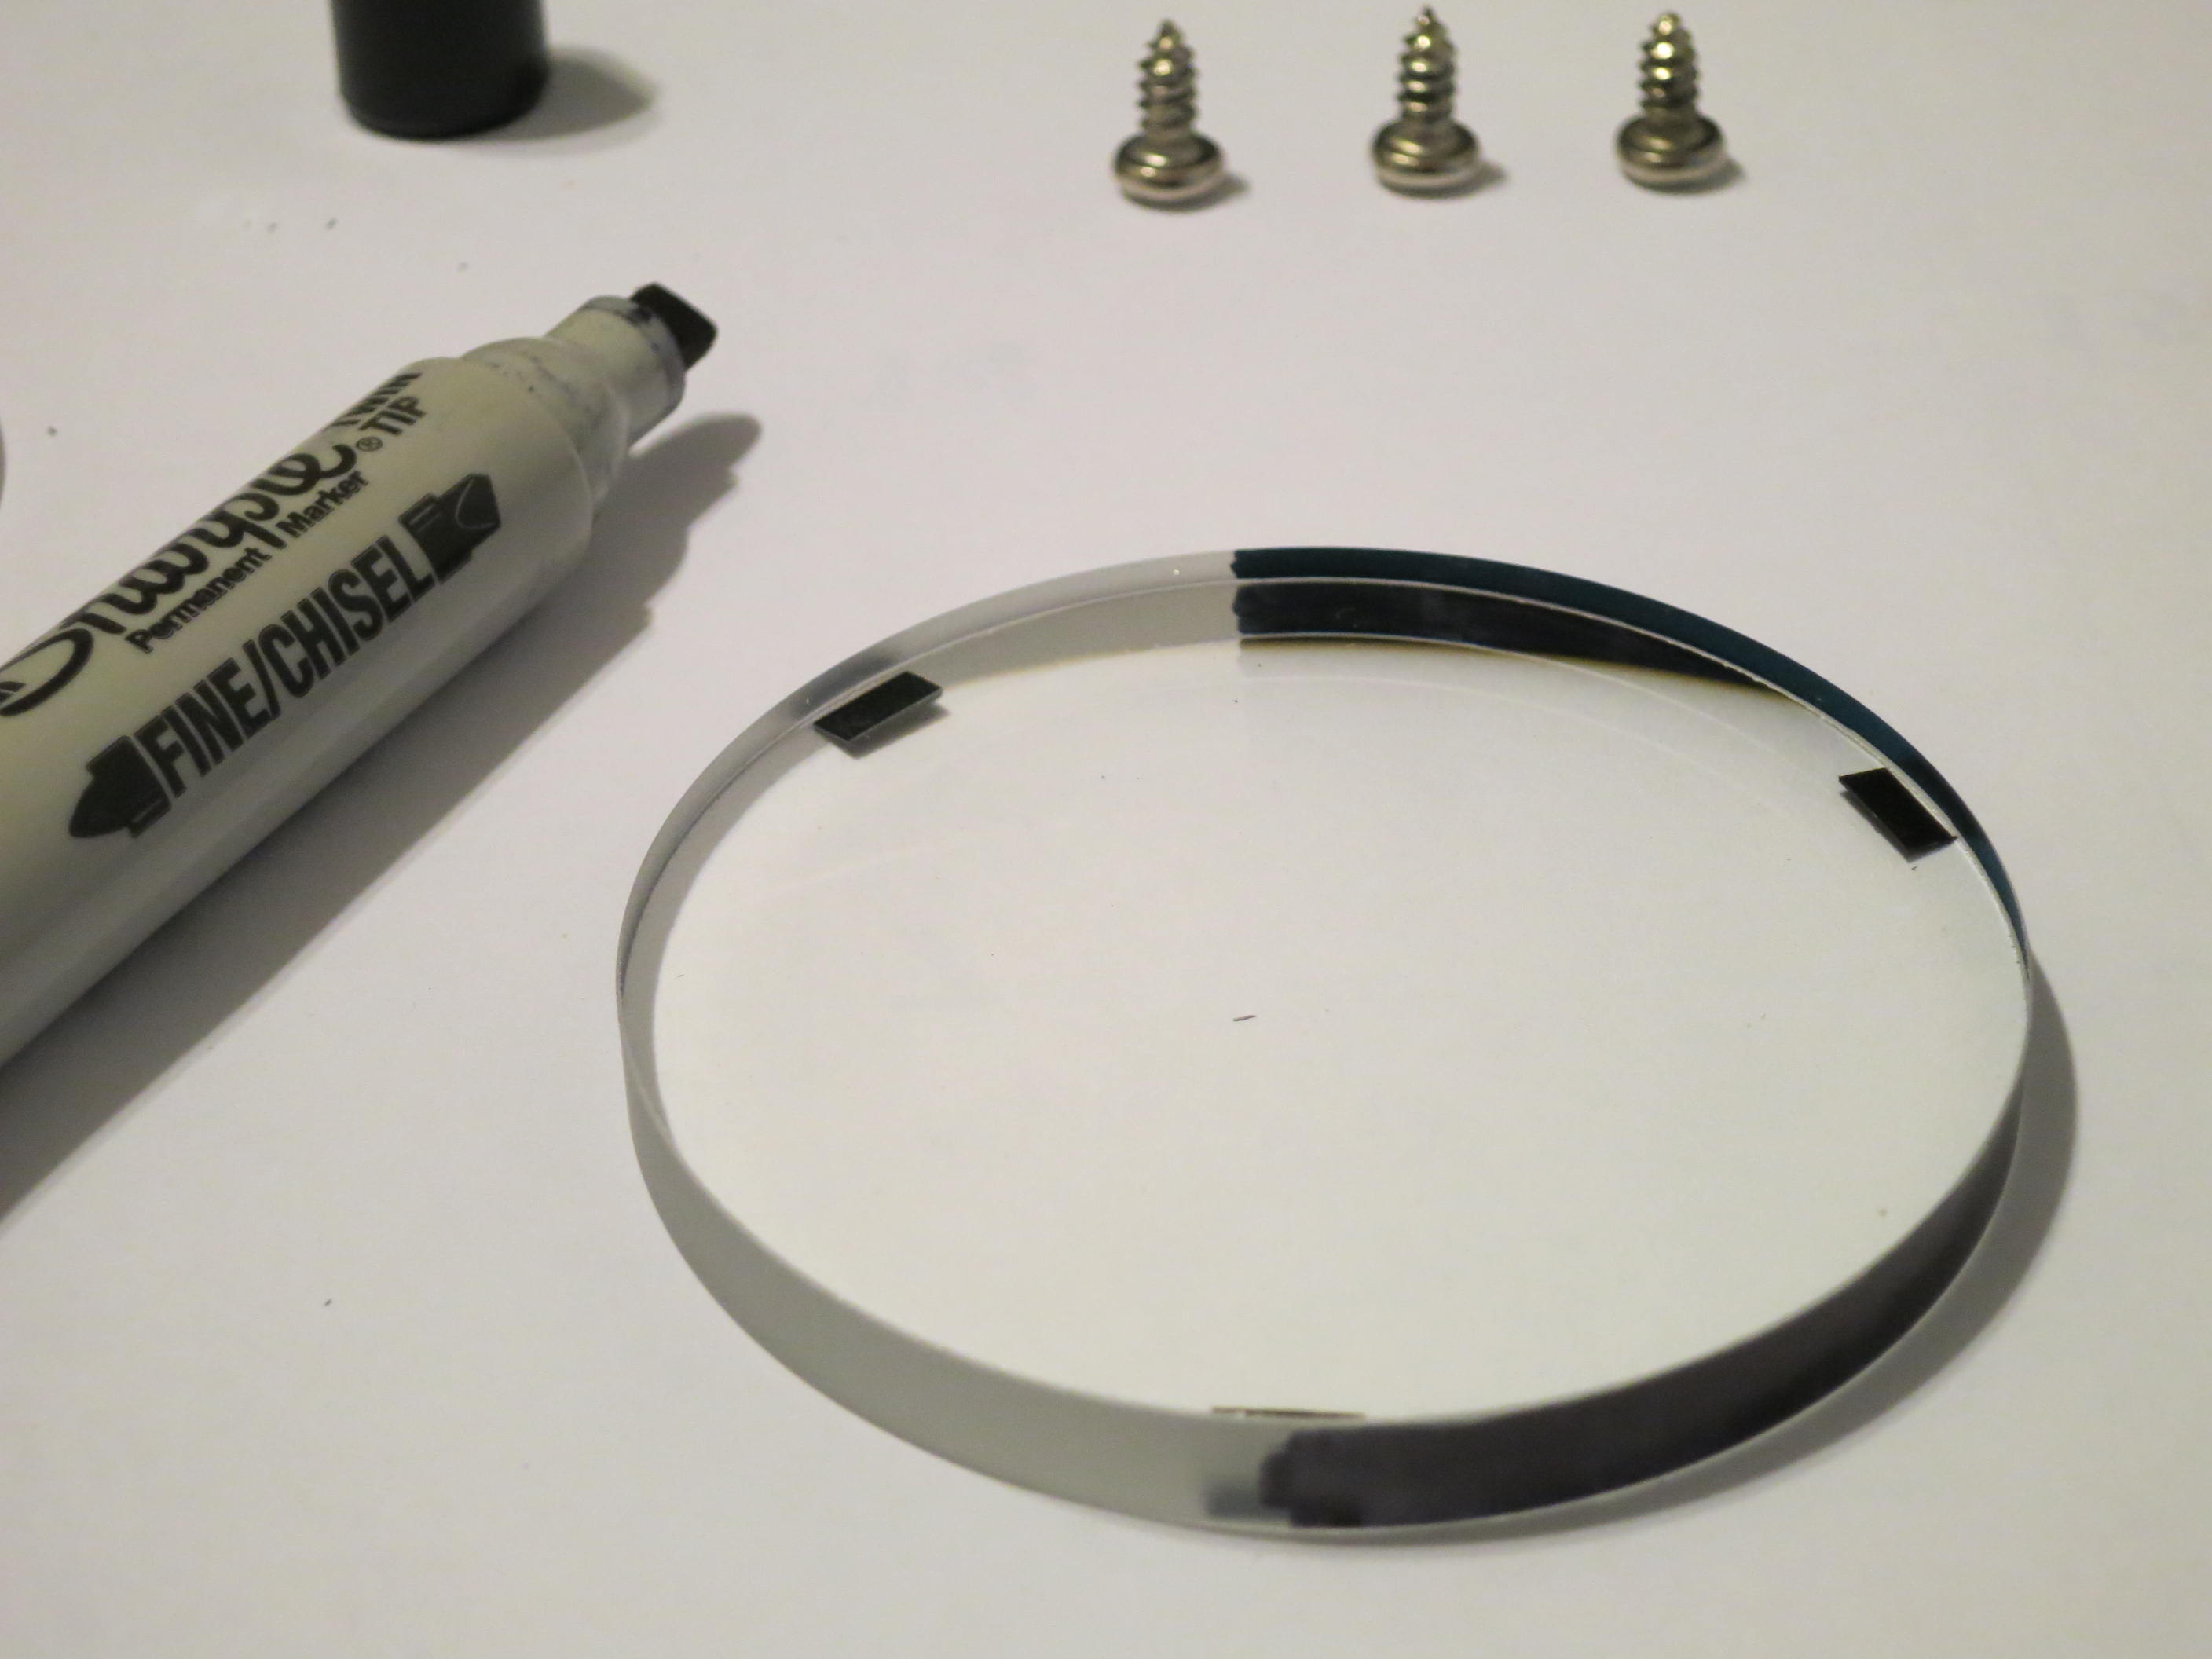
I’ll add this mod for Matt. I didn’t do this, but you can also blacken the edges of the objective. I believe Matt uses a black permanent marker. This might reduce any internal reflections in the lens. (That photo is actually from my Celestron TravelScope 70 overhaul, but the procedure would be the same for the GS.–Matt)
And lastly, use a Plossl EP instead of using the ones from kit. Go ahead and make and try out the ones from the kit for the experience, but if you really want to use the GS for viewing, use a better EP. You don’t need an expensive one. Something in the 20mm to 25mm range is probably the most useful, though I have had a 4mm in the GS viewing the moon, and other than the moon moving rather quickly, it was an interesting view! The 4mm I used was from a Celestron Firstscope reflector, another nice scope to play with if you can track one down. The Plossl EP can be used in the GS without any modifications if you can put up with the push-pull focus and having no diagonal.

Leave a comment